How to import and build a good scene?
Welcome to Para World! Please complete the following steps to create a well-functioning world of your own.
- This process is suitable for users who create their worlds with Unity for the first time. If you already know a lot about Unity, please consult other advanced Unity tutorials.
Creation Process:
1. Obtain Your Scene Resources
You can develop your resources, purchase resources from Unity Asset Store, or obtain through a variety of channels. Note that URP rendering pipelines are applied for this project currently. If the existing resources are for the URP version, it will be very convenient to import them later.
Here is an example of downloading resources from Unity Asset Store.
- Purchase resources from Unity Asset Store and click the Open in Unity button. Tips: Many scene resources are available for free in the store.
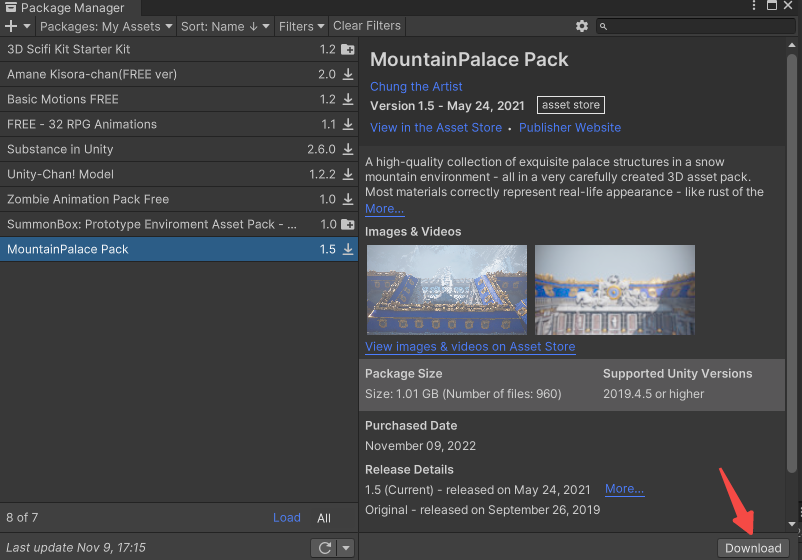
- Click the scene file you want to import, click the Download button in the lower right corner, and wait for the download to complete.
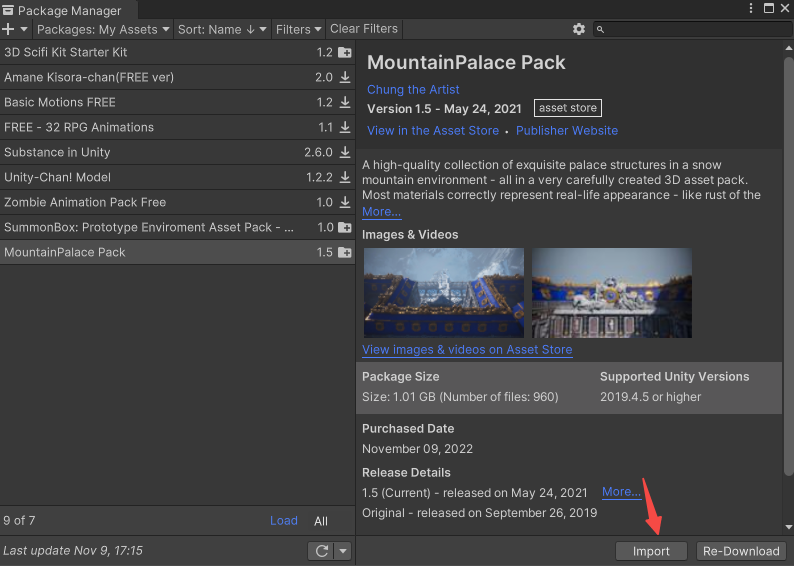
- Click the Import button to import the scene.
2. Open Your Scene
If the obtained resource contains a scene file, open the file.
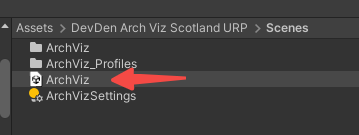
3. Check and Set up Lights
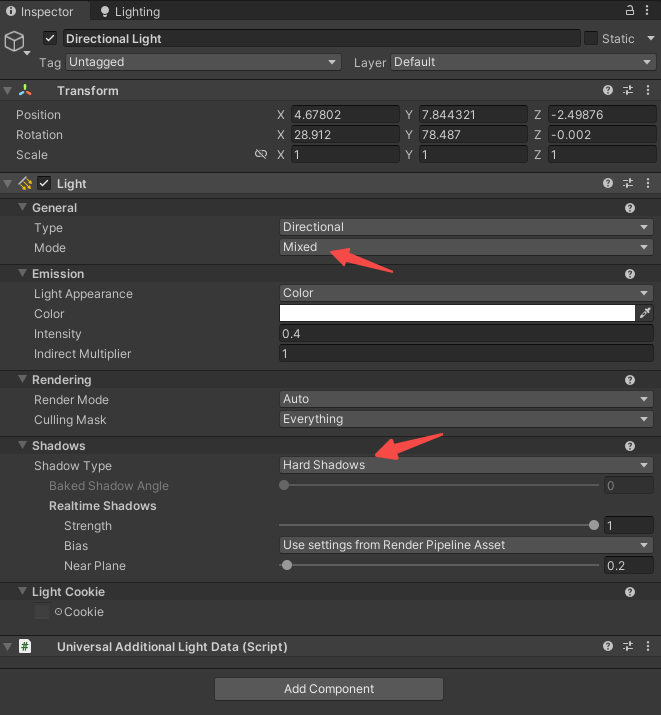
Check the number of directional lights in the scene. Since Para World needs to run on a mobile phone, currently only one directional light with a dynamic range can be supported. Make sure that you check the number of lights in the scene and confirm the properties of each light.
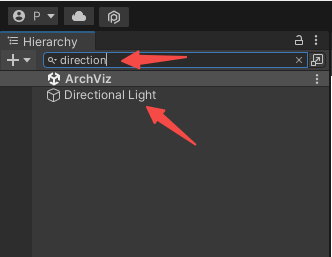
Confirm that only one directional light is mixed or real-time. (Tips: The number of baked lights is unlimited)
Check whether only this mixed light can cast shadows in real time. Note that real-time shadows cause high resource overheads on a mobile phone. Therefore, the number of lights casting real-time shadows cannot exceed 1.
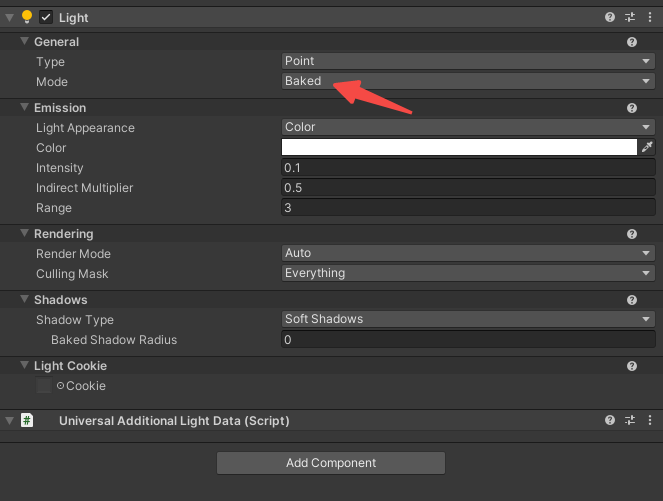
Other auxiliary lighting (Point, Spot, Area) can be arranged as needed, but be sure to apply the Baked mode as much as possible.
4. Set up an Environmental Information Configuration Table (Recommended)
This step can be skipped. However, if you set up the table, all cartoon avatars may have a chance to get better lighting effects, and it will be more convenient to configure other scenes.
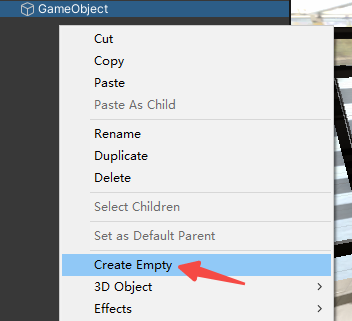
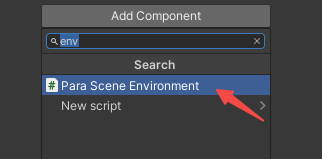
Create an empty object in the scene and add the Para Scene Environment component in the Property Panel.
Once you enable Character Light, you can configure the lighting effects for your cartoon character.
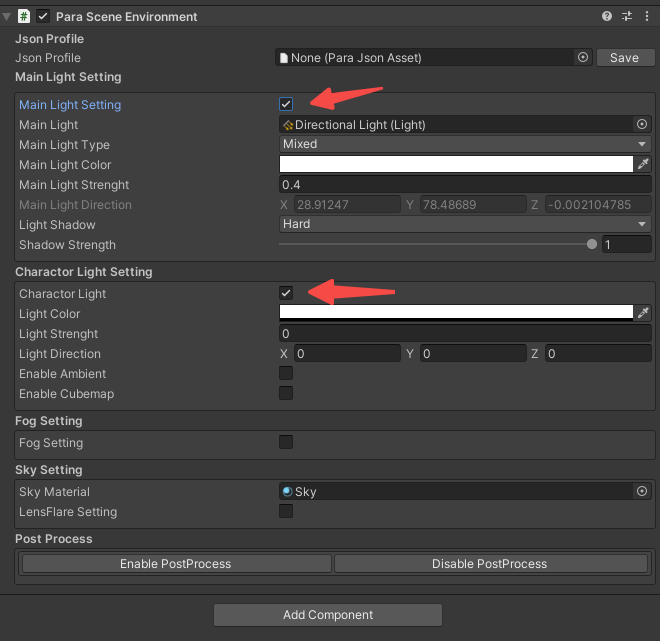
For other relevant environment settings, please see the introduction page of the environment information configuration table.
5. Place Objects in the Configured Scene
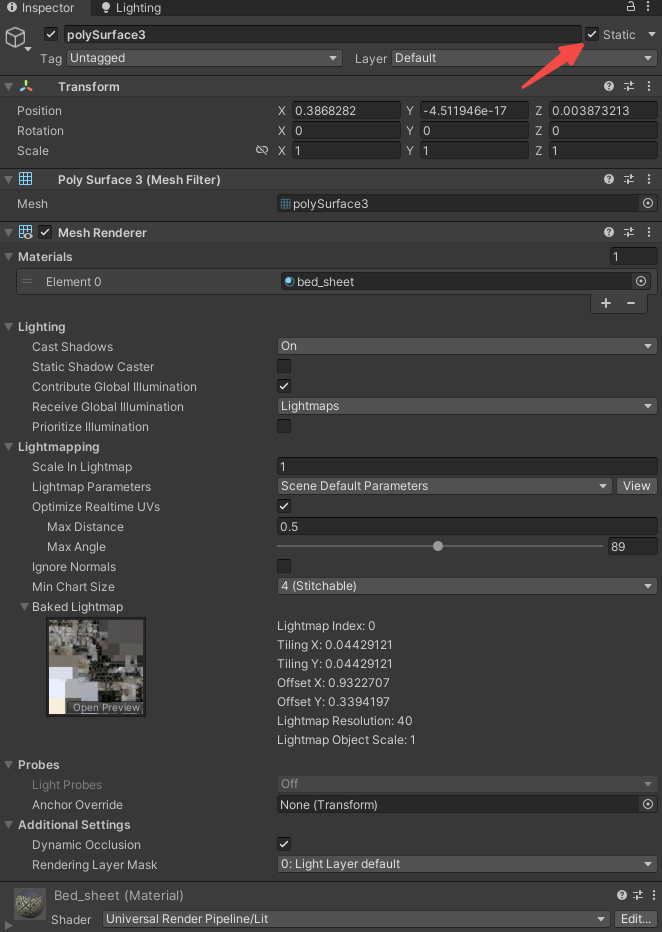
You can place objects as you like. If you want an object to participate in Lightmap baking, you have to check the Static option in the upper right corner of the Property Panel of the object. (Tips: Objects are either static or non-static and the Unity engine treats the two types of objects differently. Static objects participate in Lightmap baking while non-static don't but are applied with LightProbes.)
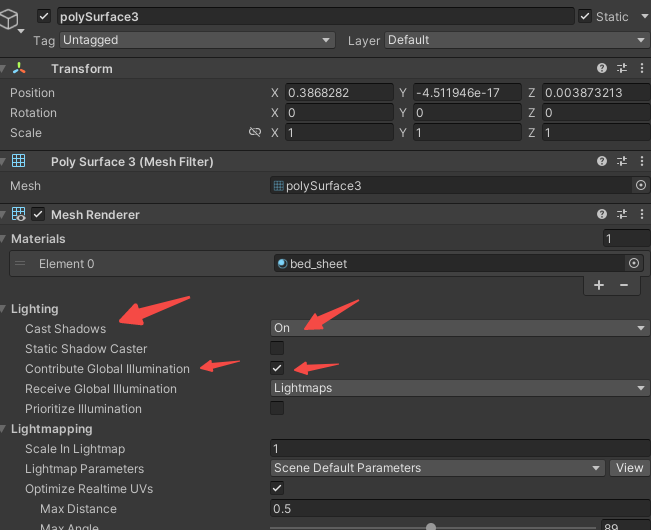
Note that if you want to enable shadow casting for an object, select On from the Cast Shadows drop-down box and if the Global Illumination effect is also needed, check the Contribute Global Illumination option below. (Tips: In general, these two options need to be enabled for most objects in the scene, except for translucence and dynamic objects which cast wrong shadows in the scene.)
6. Add the Collision Property
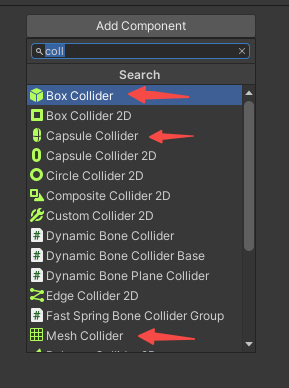
Add the Collider component for desired scene objects. For scene objects, Box Collider is a frequently-used component featuring excellent performance. (Tips: Multiple Collider components can be added to the same object.)
7. Add the Reflection Probe
For a PBR shader, it needs to read the scene cubemap. Now let’s add the reflection probe to the scene.
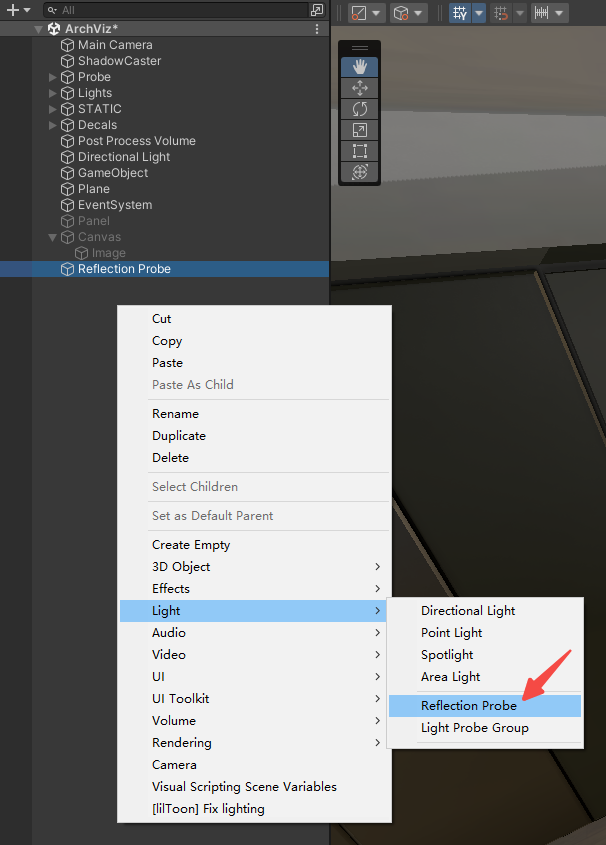
Right-click Reflection Probe and click Light > Reflection Probe from the context menu.
In the Reflection Probe window, select Baked or Custom. Do not select Realtime as the Realtime probe may cause high rendering overheads.
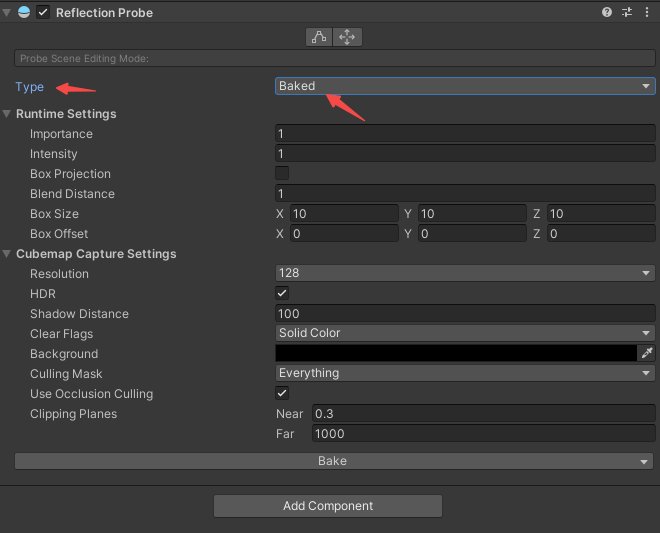
If the scene does not have any highly reflective objects, setting Resolution to 128 can meet most of the needs.
If some objects are not baked, you can check the following two points:
- Check whether these objects are static. Only objects in the scene that are set to be static can be baked into the cubemap.
- Pay attention to the maximum distance between Clipping Planes. The objects that are out of range may be cut out.
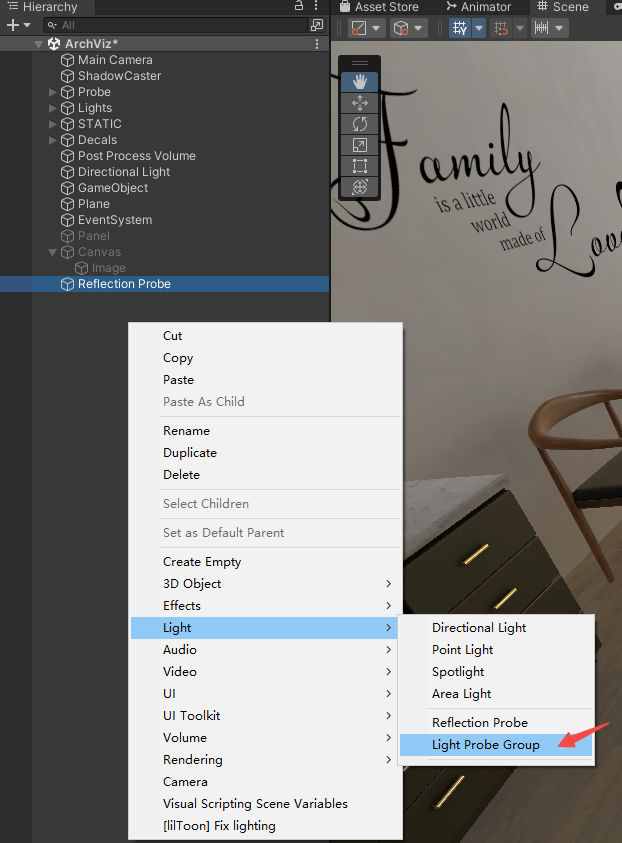
8. Add the Light Probe Group
Light Proble Group is a tool component to show the lighting differences of dynamic objects in the different areas of the scene, by which both the PBR and cartoon character shaders may be affected.
Tips: For mobile phones, Light Probe is an advantageous solution in performance.
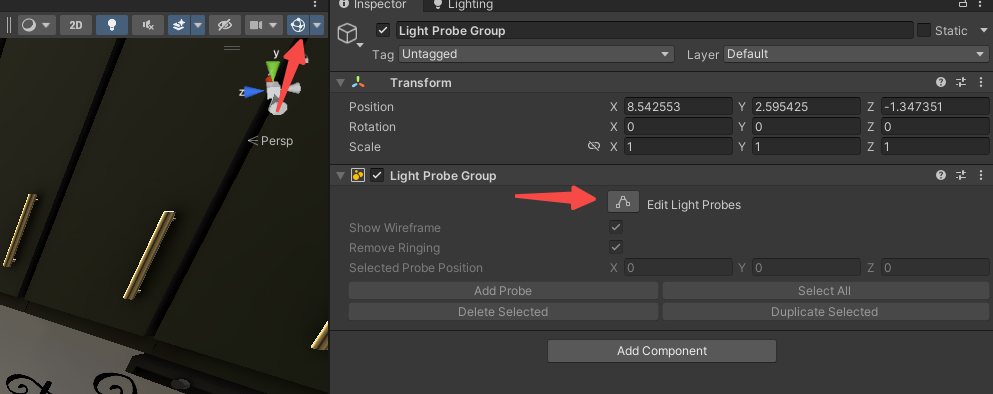
To display the tool indicator in the scene, click the Edit Light Probes button. This enables you to move, copy and place the Light Probes in the scene. When you are finished, click the button again to exit the editing mode.
Light probes are used to show light differences. You can place the probes according to the changing states of lighting differences in the scene. There is no need to place too many probes in the places with slight lighting differences.
Tips: When placing the light probes, do not overlap them with objects or lights. If a probe is hidden inside an object, the probe may be baked into black, and if the probe is too close to the lights, it may become too bright, severely affecting the brightness of the approaching character). We recommend that you do not place too many probles and only configure them in places where the light changes need to be felt. Otherwise, the check and modification may become very inconvenient.
9. Bake the Lightmaps
Baking lightmaps is a very important step to improve the scene effects. Both Light Probes and Shadowmask will also be processed when baking the lightmaps.
Click the New Lighting Settings button to show the Rendering Configuration Table. Set Lighting Mode to Shadowmask. For other settings, see the following picture for reference.
Tips: After Shadowmask baking, static shadow will be used when the shadow effect exceeds the scope of the real-time shadow.
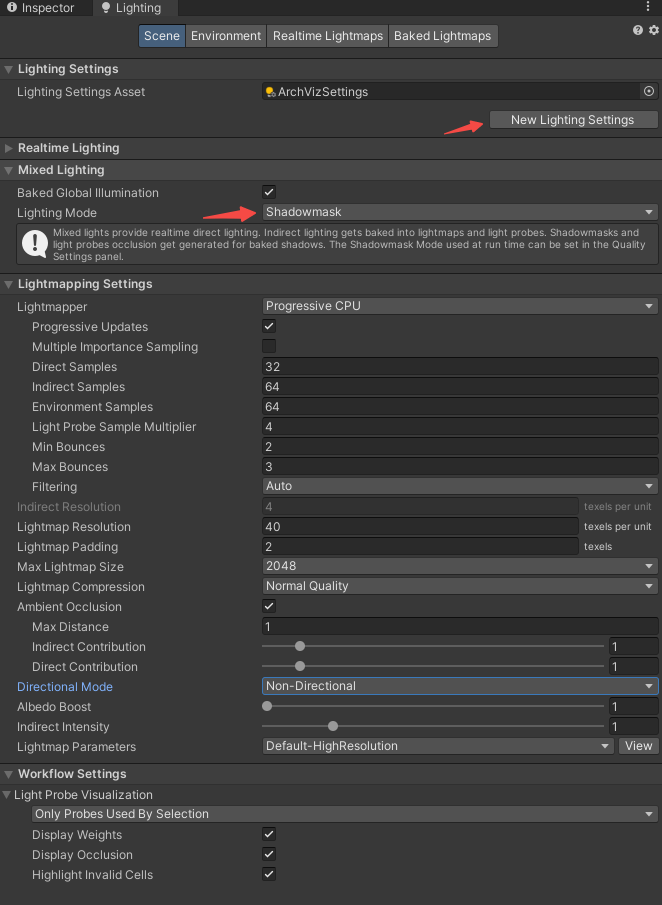
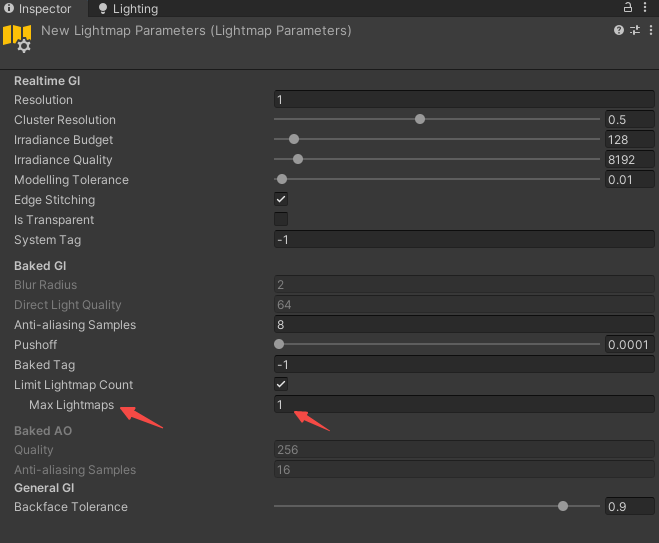
Click the Lightmap Parameters drop-down box, select New LightmapParameters from the list, then click the View button to show a new parameter configuration table. In the New Lightmap Parameters window, enable Limit Lightmap Count. This makes it easier to adjust and configure lightmaps while ensuring a better performance.
(Tips: Usually, if the scene scale is not very large, it is ok to limit the number as 1, and we recommend that you do not set Max Lightmaps to a number larger than 4. )
Click Generate Lighting to start baking.

Until now the scene creation is completed!
Updated 11 months ago