How to Make a Light That Can Be Turned On or Off?
It is very fun to make an interactive object in a World. This tutorial teaches you how to make a light that can be turned on or off in a World. Let’s get started!
Step 1: Create a Point Light in a Scene
Before you start, you must create a URP Unity project and import the World SDK into the project. If you do not know how to do that, view the steps in the Getting Started section. This will not be described here.
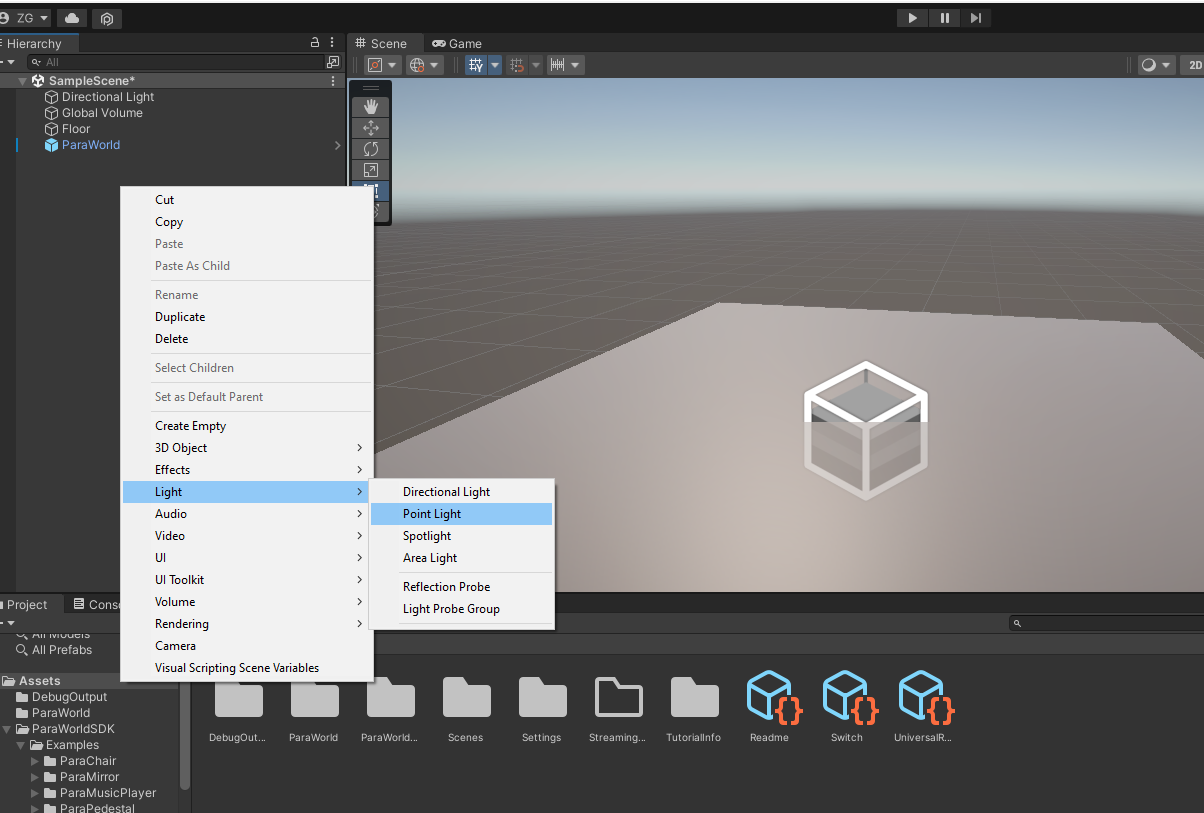
- In a Unity scene, right-click to create a point light. (Tips: You can add at most 8 dynamic lights to a scene. Otherwise, performance issues may occur, resulting in upload failures. Use lights carefully. For more information, see World Asset Specification.)
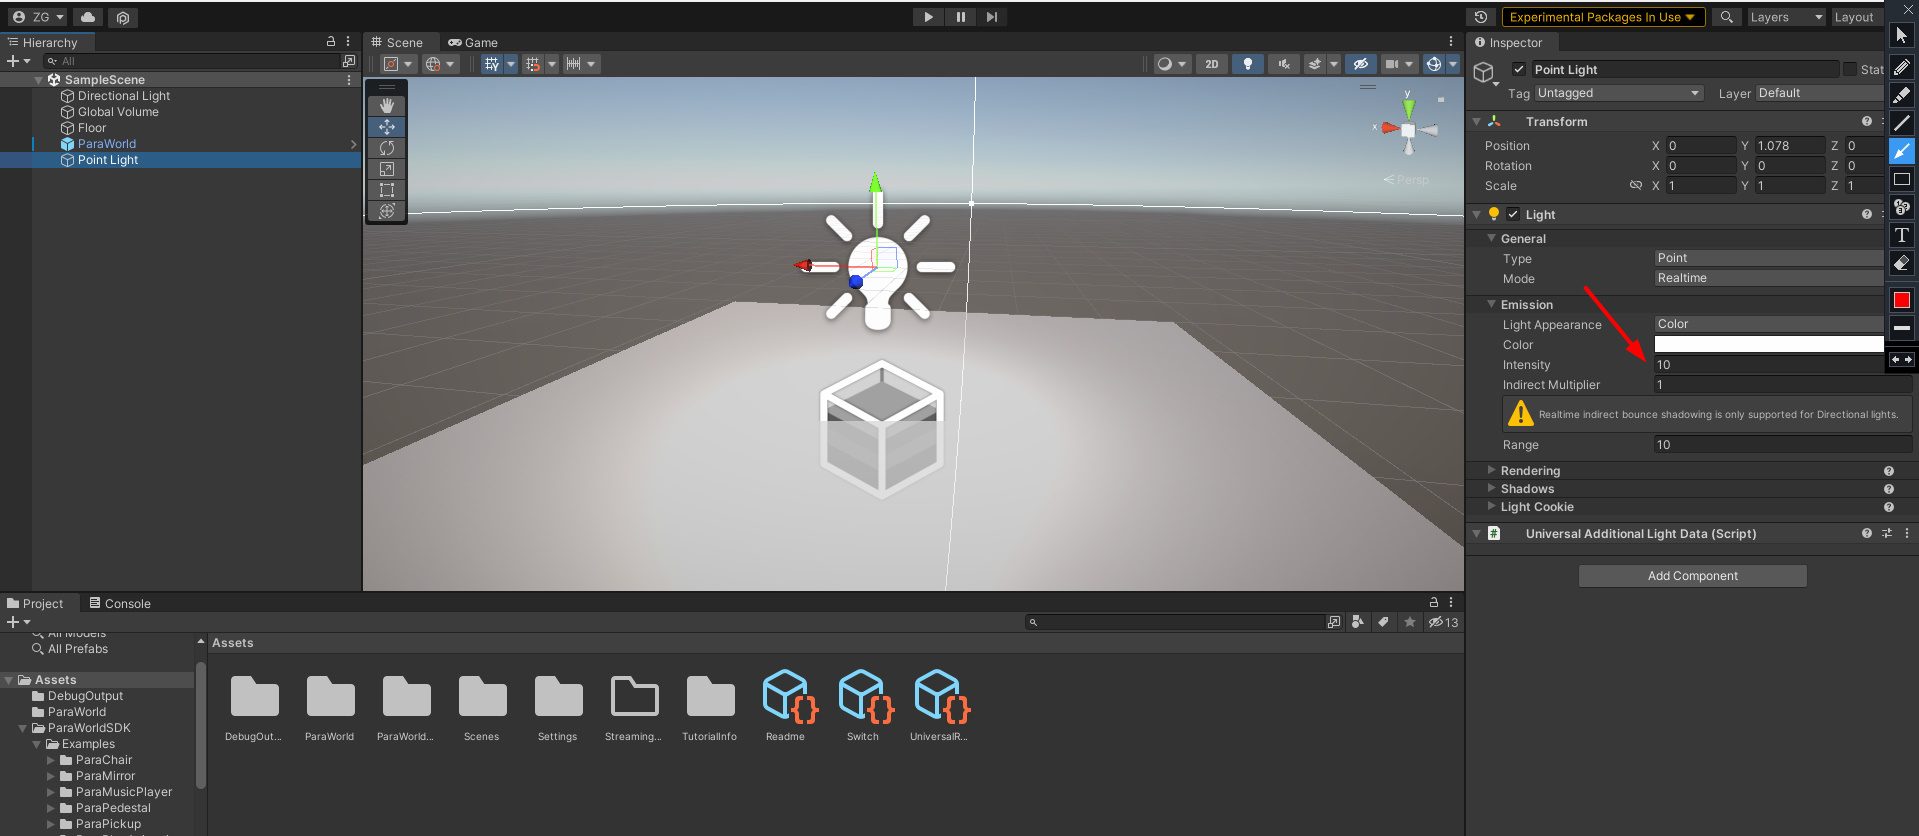
- After you create a light, adjust the intensity of the light in the Inspector panel. In the following figure, it is set to 10.
Step 2: Create a Switch Object in the Scene
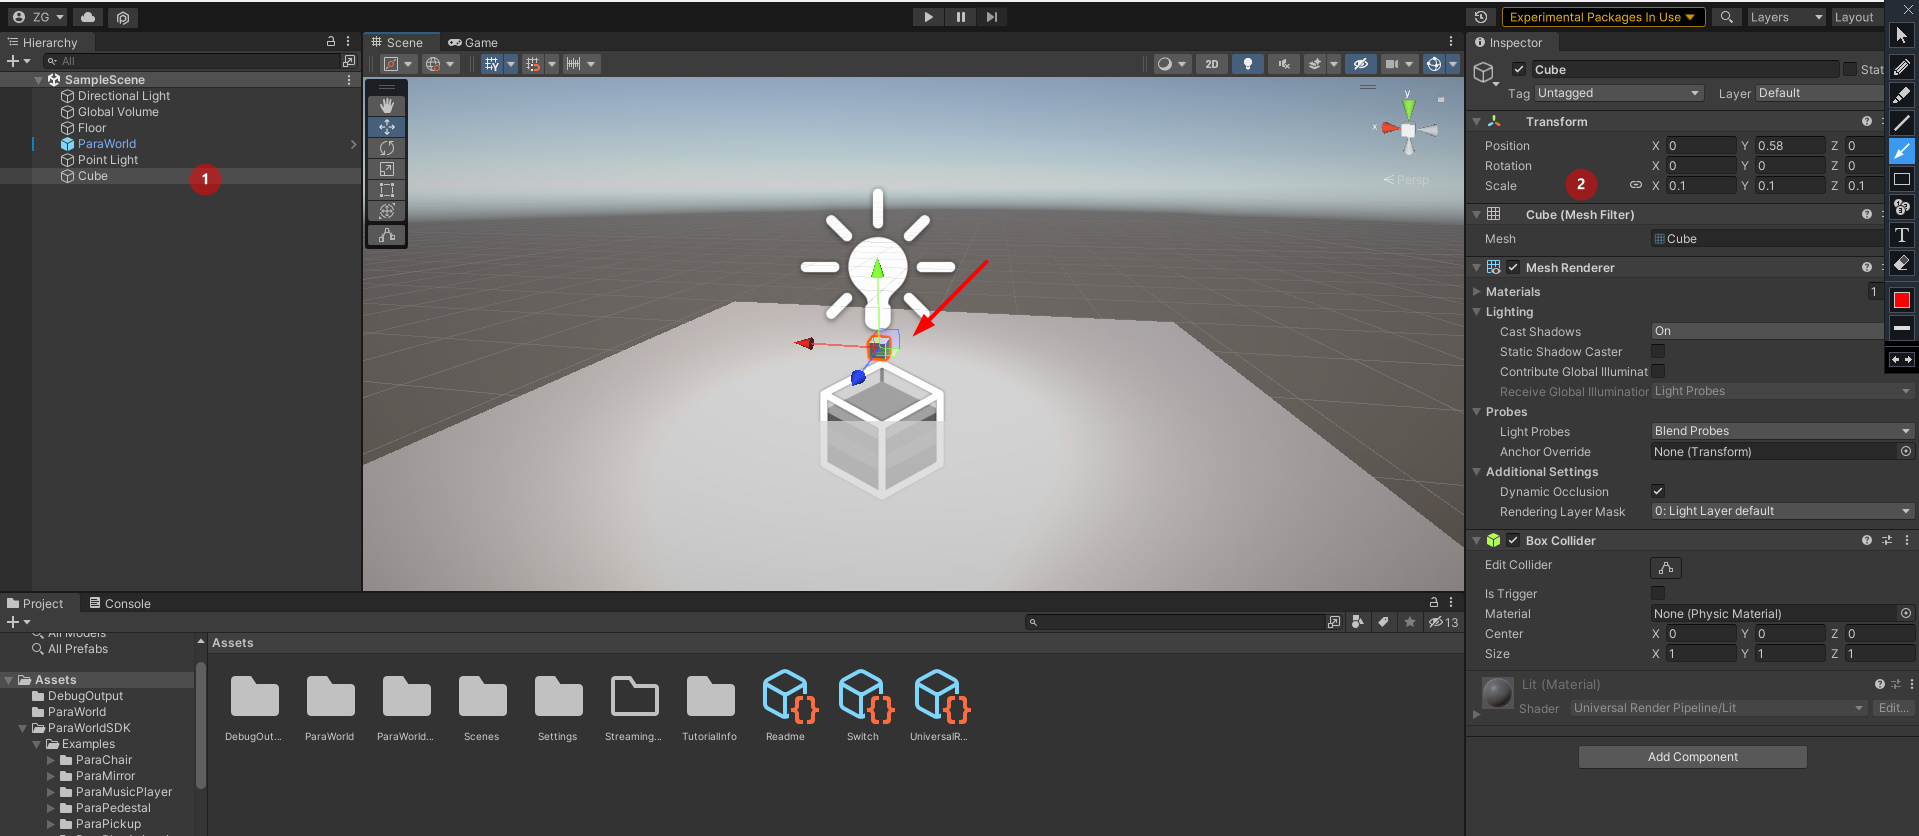
- Create a light switch. For the purpose of demonstration, we have created a Cube object as the light switch and adjust its Scale to 0.1.
Step 3: Attach an Interactive Script to the Switch Object
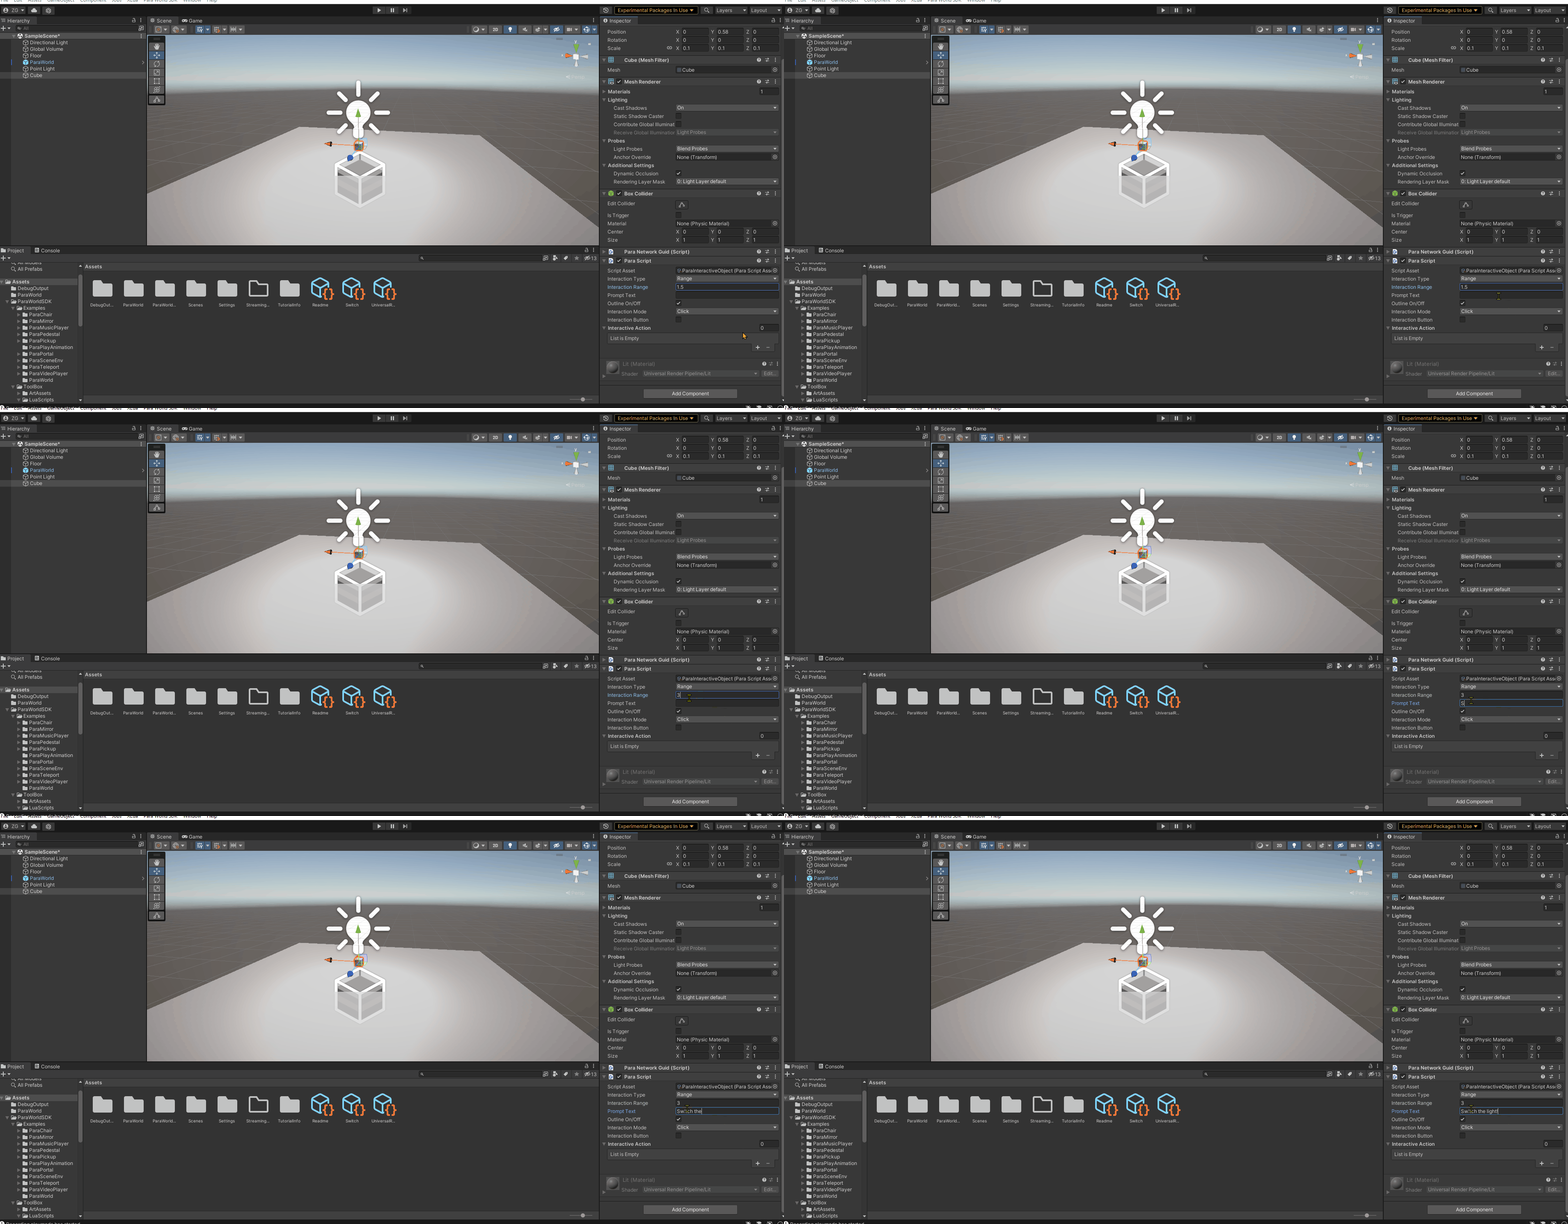
- To make this switch object interactable, you must add logic to it. The first step is to add a ParaScript component to serve as the container for running a Lua script and attach a Lua script named ParaInteractiveObject to the component. This Lua script is provided by ParaSpace and contains interaction logic.
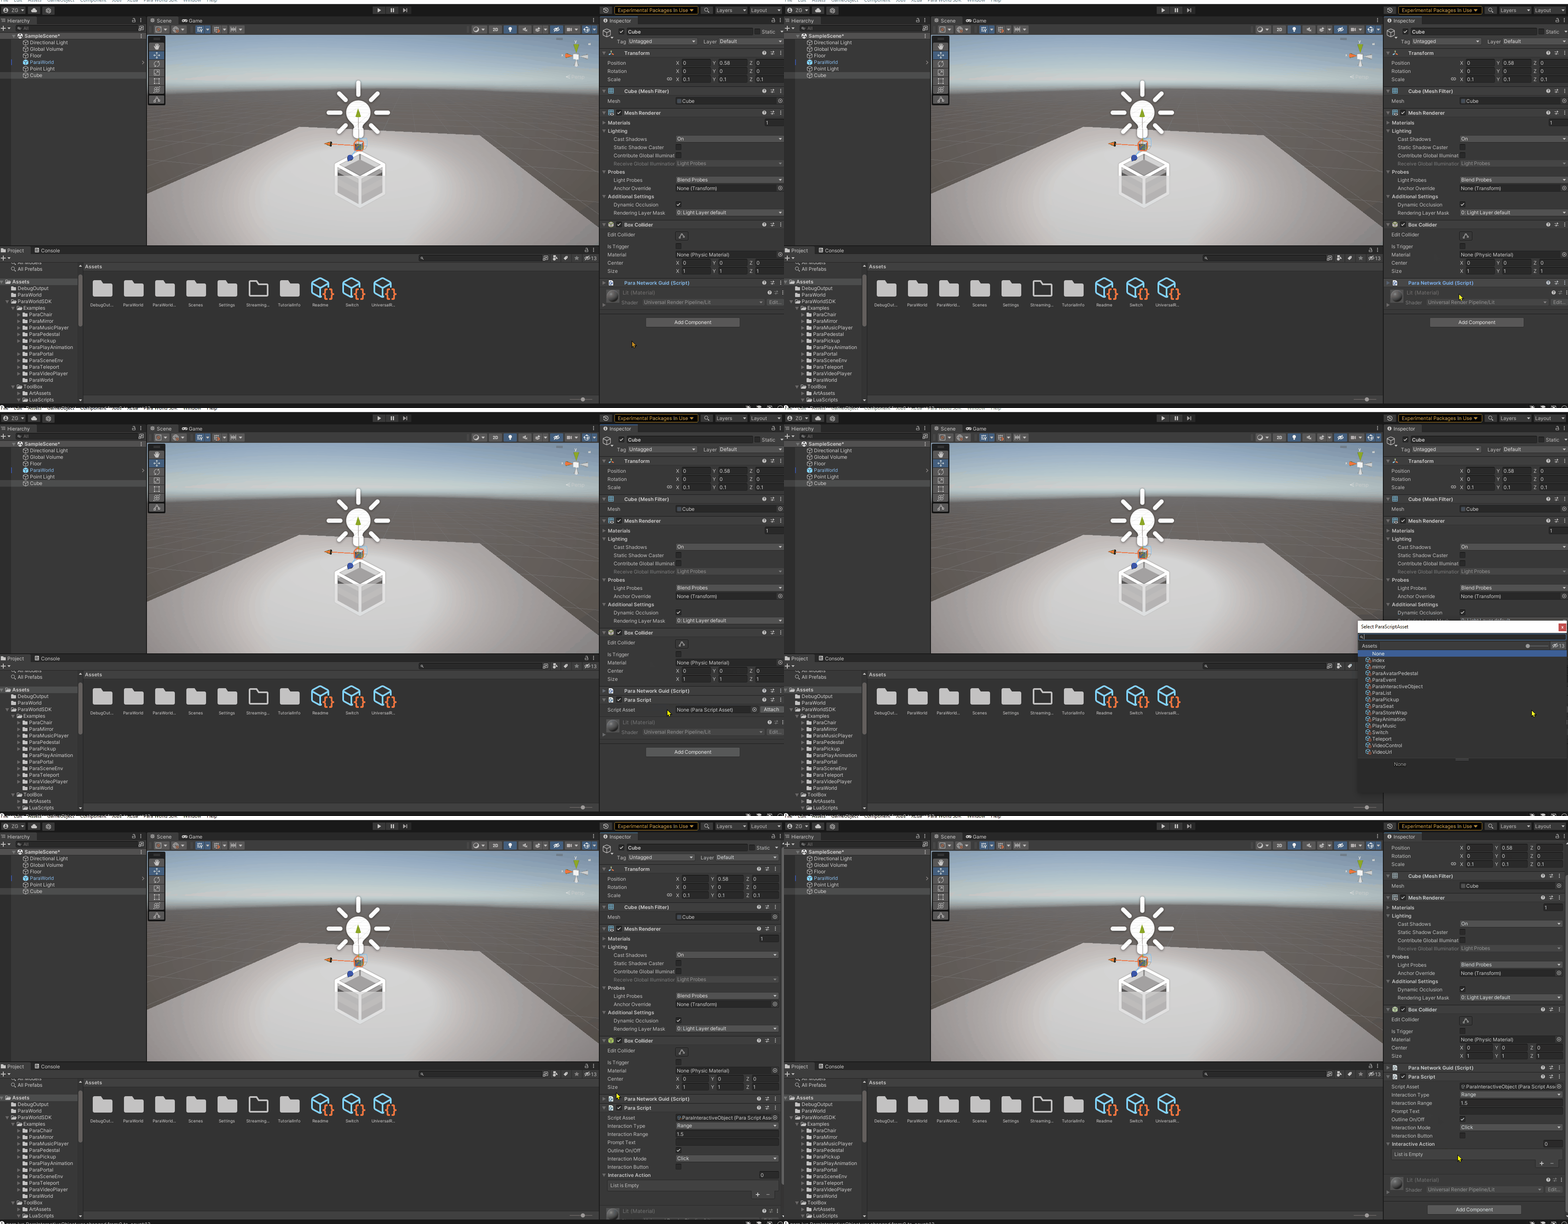
- The following describes the parameters used by the ParaInteractiveObject script:
- Interaction Range specifies the range in which players can interact with this object. The unit is meter. In this example, set it to 3.
- Prompt Text indicates the prompt displayed on the interactive object. In this example, set it to: Switch the light!
- For information about other parameters, see: ParaInteractiveObject
Step 4: Create a Switch Script
- After you complete the previous step, you can interact with the Cube object and trigger certain "logic". "Controlling the light after interaction" is what we want to achieve. You need to write this logic on your own.
- Create a Lua script named SwitchLight in the Unity project and add the following content to the Lua script:
- The first line of the script declares a GameObject whose variable name is light.
- The following function code segment defines a function named SwitchLight, which will switch the active state of the light object when being called.
---@var light:UnityEngine.GameObject
---@end

function SwitchLight()
    light:SetActive(not(light.activeSelf))
end- After copying and pasting the preceding script, remember to press CTRL + S to save it. Then add the ParaScript component to the Cube object in the Unity project and add the new Lua script to the ParaScript component. After you finish this, you can see the light parameter. Drag and drop the light object that you want to control to this parameter.
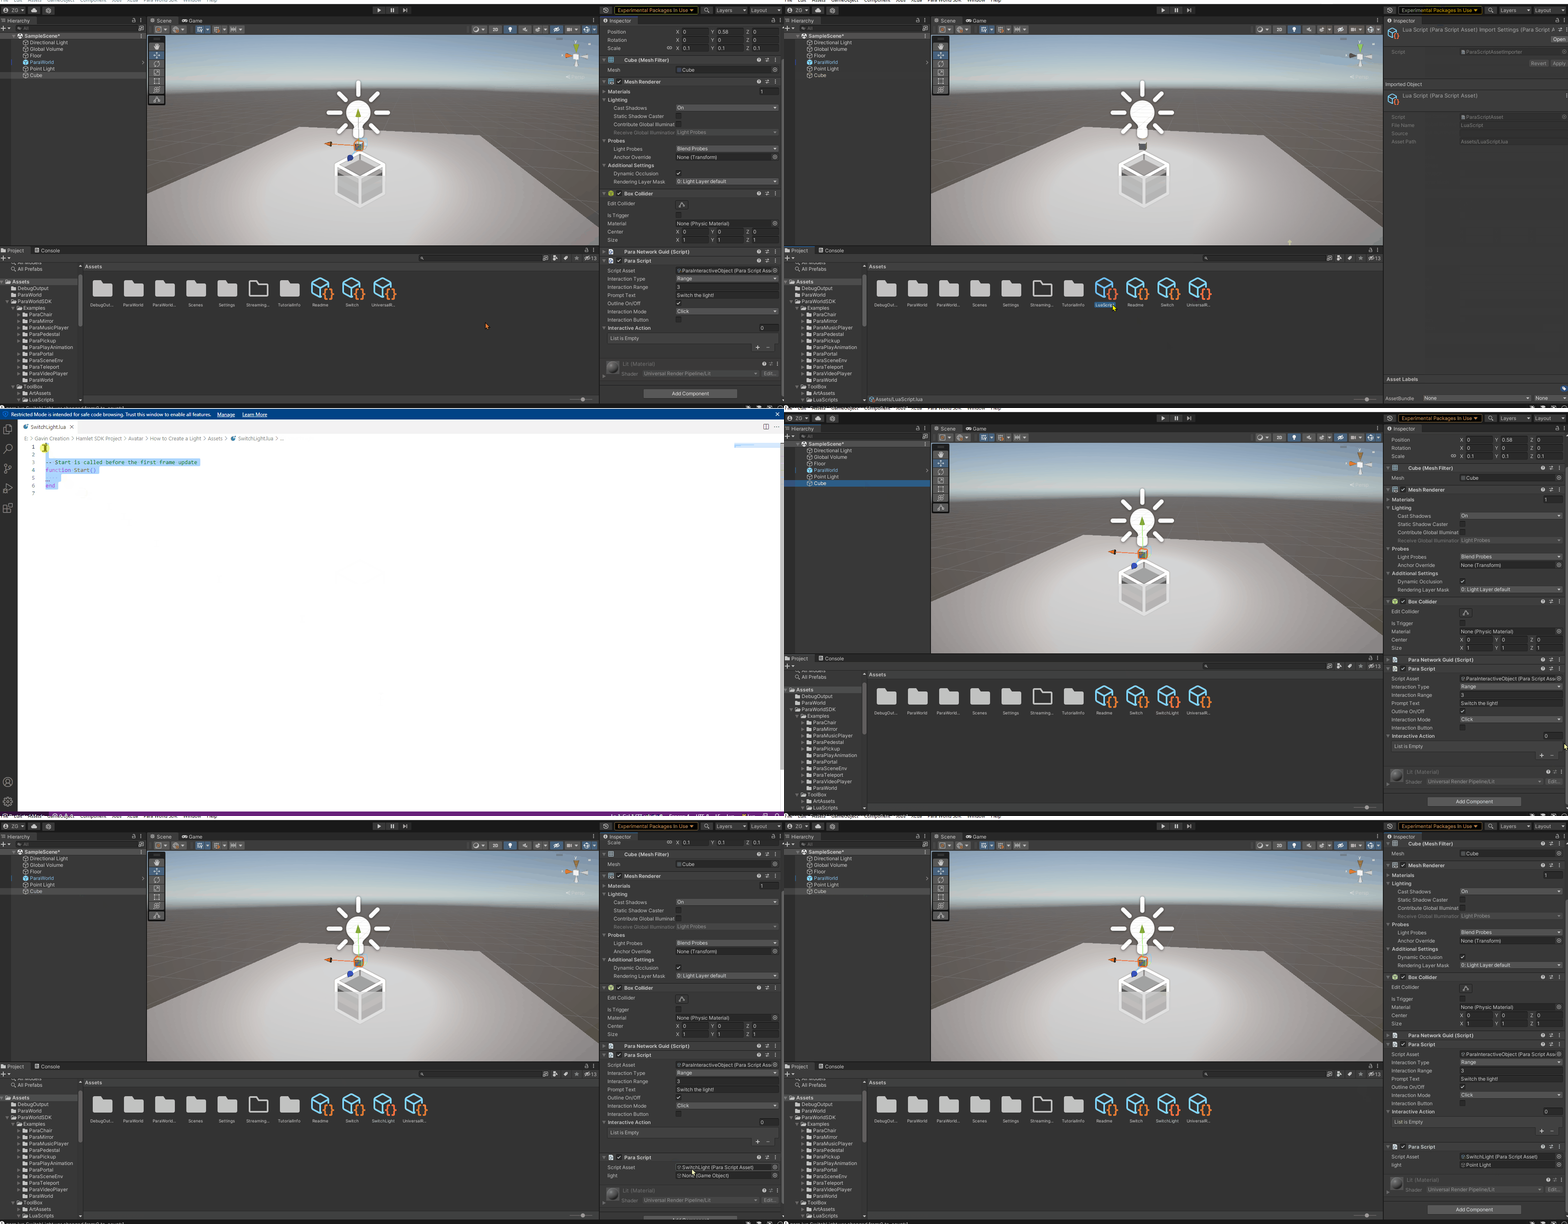
- Now the switch object has 2 scripts. One is the ParaInteractiveObject script, which makes the object interactable and triggers the second script. The second script SwitchLight provides the logic for turning on or off the light. Next, you need to connect the 2 scripts.
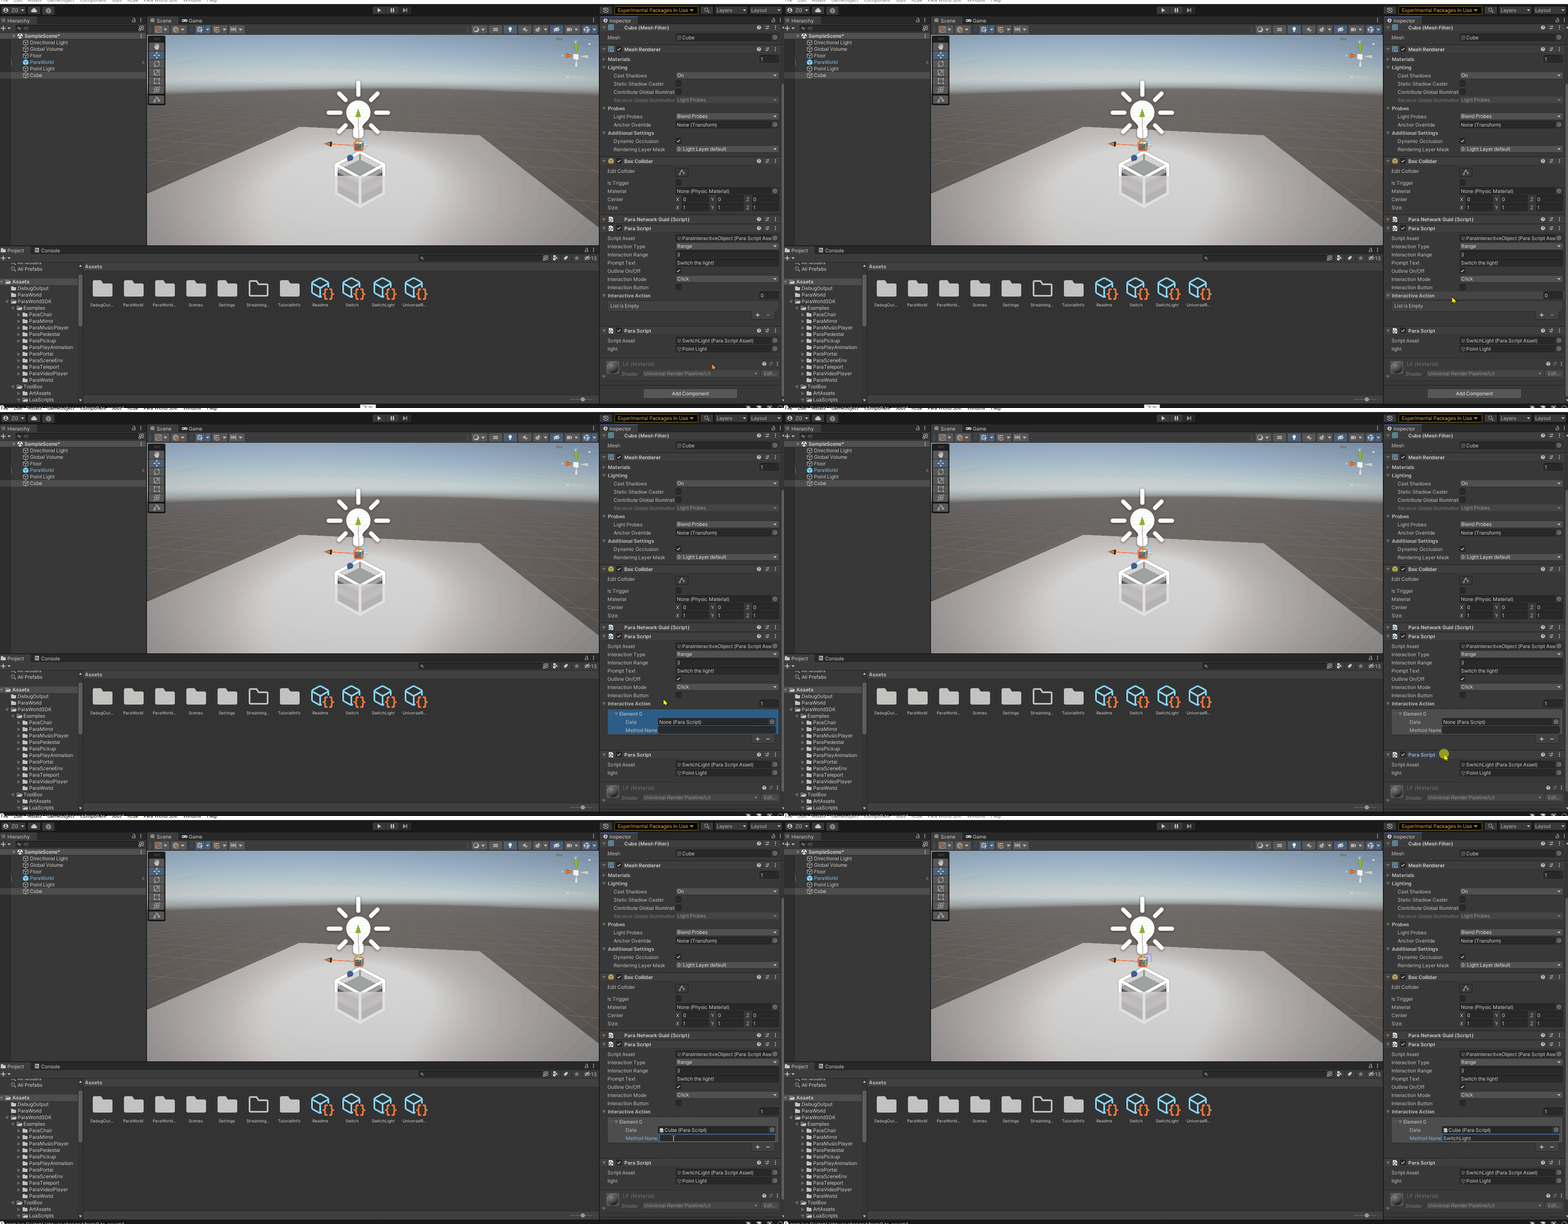
- Add an Interaction Action to the ParaInteractiveObject script. Drag and drop the SwitchLight ParaScript to the action, and enter SwitchLight (the name of the function used for turning on or off the light in the SwitchLight script). Now the 2 scripts are connected.
Step 5: Debug the Light
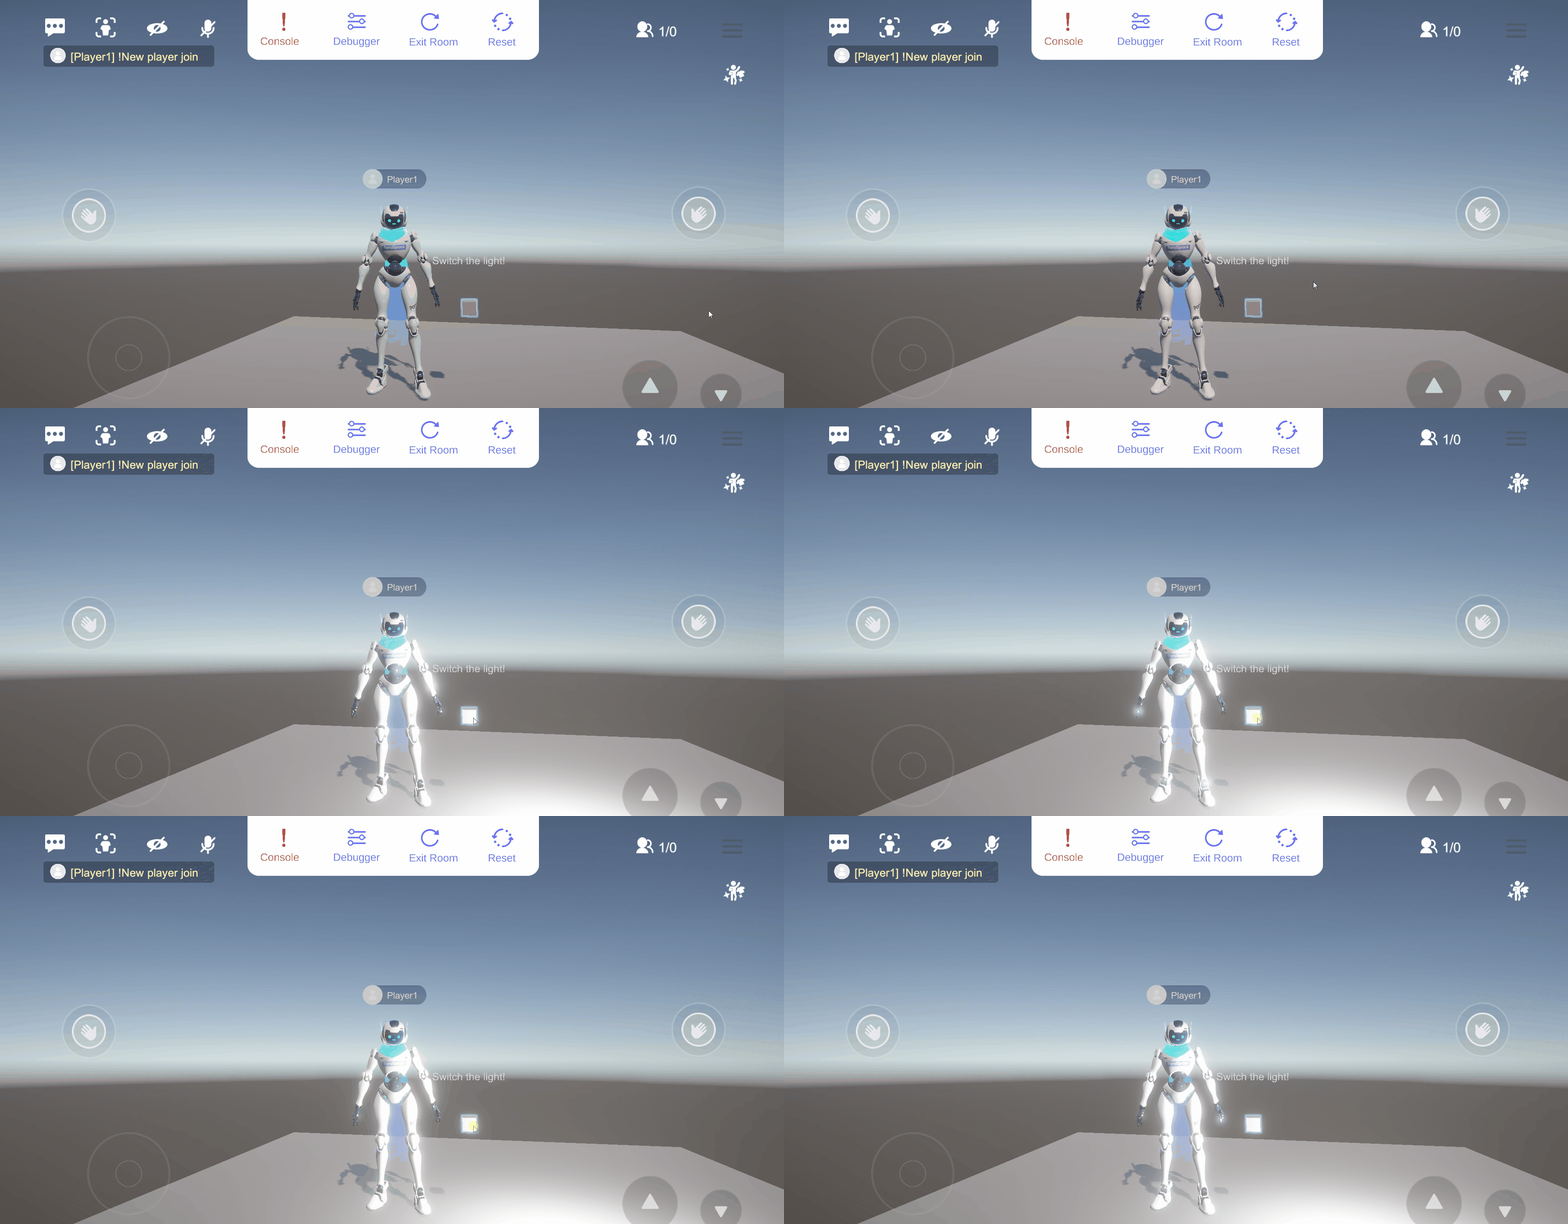
- Now you have completed all steps. Upload the object to the platform or open the debugger to view how it works. If you do not know how to use the debugger, see: https://docs.paraspace.tech/docs/how-to-debug
- Check how the light works in the debugger:
Updated 9 months ago