
How to Create a Bubble Gun?
When creating a basic interaction object or pickup object, you might want an interactive button to be responsive to events beyond clicks, for example, presses, releases, long presses, and drags. To facilitate this, ParaScript provides a series of UI-related messages that make it easy to define the operations performed when a player touches the interactive button. (Note: Click events can be easily configured in the Inspector panel. If you are not familiar with the configuration process, see [this tutorial](how to make a light).)
In this topic, we will take a "bubble gun" as an example to show how to use UI-related messages to handle events on interactive buttons.
Step 1: Design a Bubble Gun
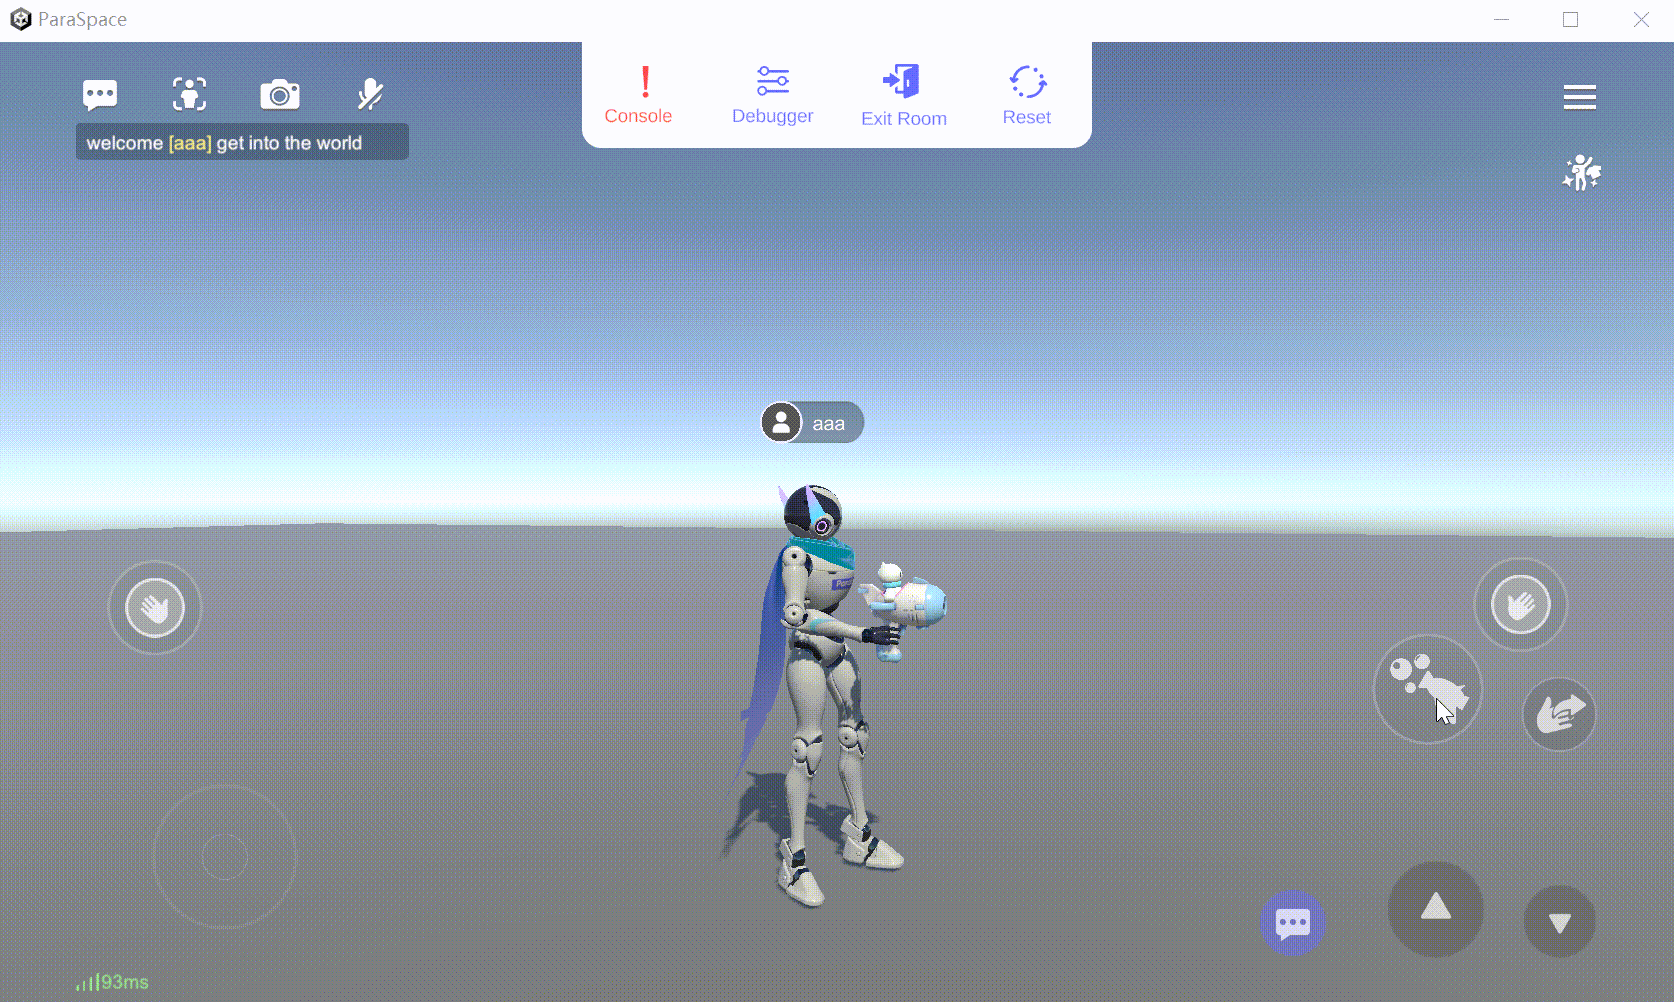
This bubble gun is a pickup object. After it is picked up, the interactive button changes to a shooting button. When a player holds down the shooting button, the bubble gun keeps firing bubbles.
Step 2: Write a Bubble Gun Script
- Use particle effects to create visual effects of bubbles. To make the effects more vivid, use 2 particle systems to separately represent the bubbles and the water dripping down from the gun muzzle when bubbles are fired. Define 2 variables to store the corresponding particle systems.
---@var BubbleParticles: UnityEngine.ParticleSystem
---@var WaterTrailParticles: UnityEngine.ParticleSystem
---@end- To continuously fire bubbles when the player holds down the shooting button, define the responses to the press and release events of the interactive button. The message for the press event is OnUIPointerDown, while the message for the release event is OnUIPointerUp. When any default UI button of the current object is pressed or released, the corresponding function is called. Therefore, you need to add the uiType parameter in the function body to determine whether the current operation is performed on the main interactive button. If the operation is performed on the main interactive button, control the bubble gun so that it starts or stops firing. Additionally, you can add handType to determine whether the current event on the interactive button is triggered by the left or right hand.
function OnUIPointerDown(uiType, handType)
    if uiType == UIType.Main then
        StartShooting()
    end
end

function OnUIPointerUp(uiType, handType)
    if uiType == UIType.Main then
        StopShooting()
    end
end- Define the StartShooting and StopShooting functions to make the bubble gun start or stop firing. As we want all players to be able to see the visual effects of bubbles in a multiplayer game, we use SendMessageToAll to send messages to all clients to control the enabling and disabling of the emission of the particle systems, so that all players can see the particles emitted by the bubble gun on their clients.
function StartShooting()
    self:SendMessageToAll("StartShootingRPC")
end

function StartShootingRPC()
    BubbleParticles.emission.enabled = true
    WaterTrailParticles.emission.enabled = true
end

function StopShooting()
    self:SendMessageToAll("StopShootingRPC")
end

function StopShootingRPC()
    BubbleParticles.emission.enabled = false
    WaterTrailParticles.emission.enabled = false
end
Step 3: Configure the Script
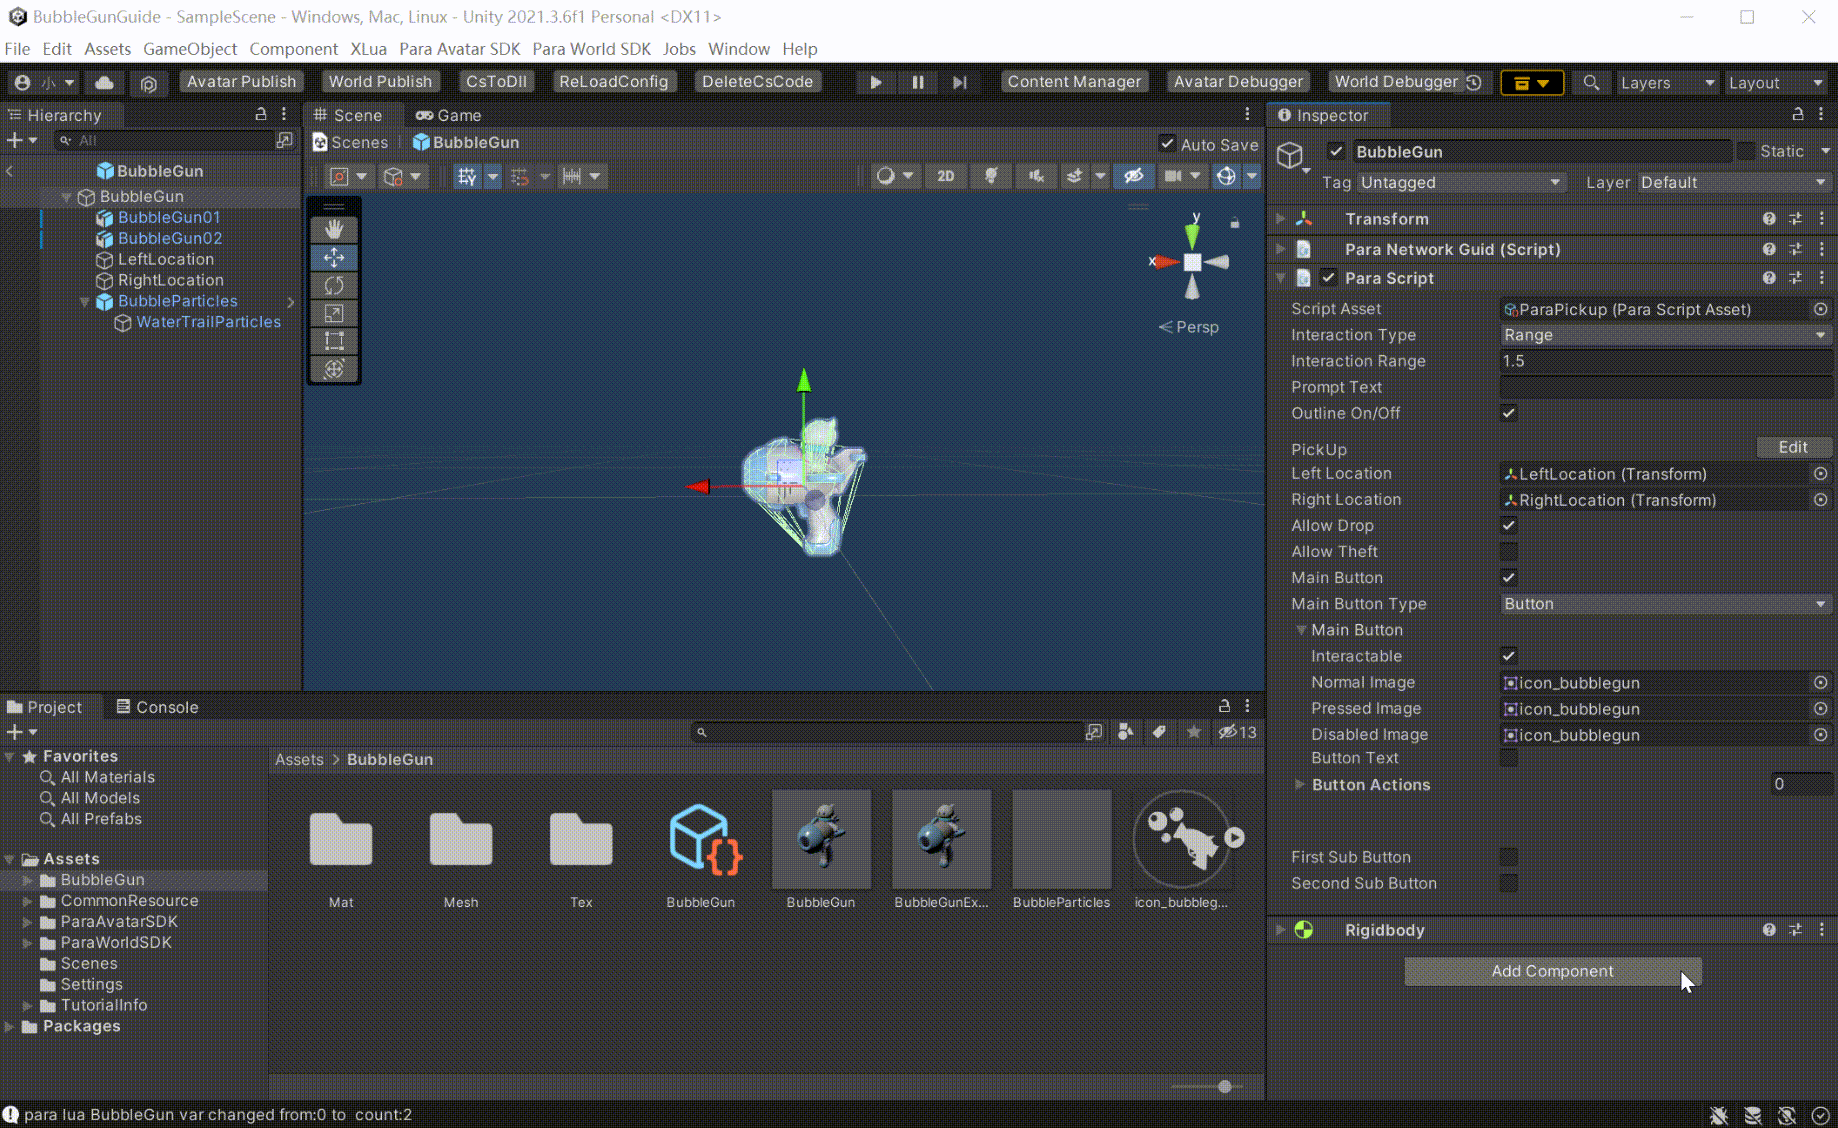
- Download and import the resource[download URL]. The prefab BubbleGun already has a bubble gun model, pickup point, and particle systems. Now you can configure it. (The prefab BubbleGunExample is a configured bubble gun!)

- Mount Para Pickup to the bubble gun so that it turns into a pickup object. Set a pickup point and the icon of the main interactive button.

- Add a Rigidbody component to the bubble gun so that it will be affected by gravity, and add a collider.

- Attach the bubble gun script so that the messages of the current object can be handled. Remember to set the variables of the particle systems.
- Now, a bubble button that fires upon a press on the main interactive button is created. Have a try!
Updated about 1 year ago