
How to Reduce Faces of an Avatar?
Faces are fundamental components that make up the surfaces of 3D objects. They play a crucial role in defining the shape and appearance of the model. A face is a two-dimensional polygonal surface that connects a set of vertices (points in 3D space) to form a closed shape. Faces are the building blocks of 3D models, acting as the surfaces that connect vertices and allow the creation of complex and visually appealing 3D objects.
Warning:In this document, we assume that you already have installed Blender and Cats Blender Plugin.
You also need to prepare your own avatar model (preferrably in .fbx file format).
This section provides instructions in ideal conditions. During actual operations, unexpected errors may occur due to platform restrictions or engine problems.
Tips:If you haven't download or don't know how to download Cats Blender Plugin, check this document out, in which we provide detailed steps about how to download Cats Blender Plugin.
Create Blender Project and Import Avatar to Blender
- Open a Blender Project.
- Select the default model and delete it.
- Navigate to the "File" tab and click "Import".
- Choose the corresponding file format of your avatar model and import your avatar.
Decimate Faces Using Cats Plugin
To reduce faces, the first step is to select the model to decimate. In the 3D viewport, right-click on the object to select it. Press the tab key on your keyboard to enter the editing mode of Blender. Navigate to the Cats Plugin interface, and find the "Decimation" tool.
After finding the "Decimation" tool, select the specific area that you want to decimate faces. (In this tutorial, we select the whole mode.) We suggested using "Smart" decimation mode to reduce faces, as it will repair shape keys after decimation.
Select "Smart", which is by default selected.
In Blender, when using the Cats Blender Plugin for decimating 3D models, you have the option to select from three different levels of decimation: "Good," "Excellent," and "Quest." Each level corresponds to a specific target number of triangles that the decimation process aims to achieve.
It's always advisable to test different decimation settings and inspect the results to ensure the final model meets your expectations and remains visually appealing and functional in its intended application.
Tips:Indeed, in addition to the predefined decimation options ("Good," "Excellent," and "Quest"), the Cats Blender Plugin offers the flexibility to manually set the target number of triangles after the decimation process (see example below). You can either type in the target number or drag the number box to the right or left.
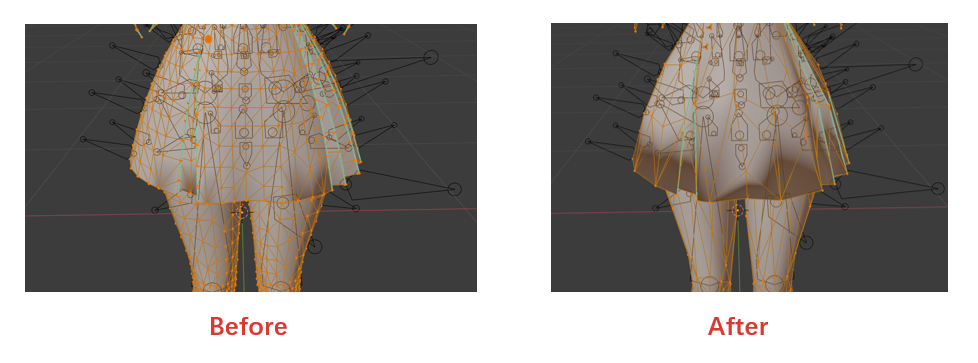
See the difference before and after decimation below:
Export Your Avatar Model Using Cats Plugin
Once you have finished creating and editing your avatar model, the next step is to export it.
To export it, you can follow these steps:
- Navigate to the "Export Model" file in the Cats Plugin window and click on it.
- Click on "Continue to Export".
- Choose a location on your computer where you want to save the exported file and give it a name.
- Click on the "Export FBX" button to begin the export process.
Tips:Note that if you want to export your model along with textured images, you may change the "Path Mode" to "Copy".
Updated about 1 year ago