
Create Your First Avatar
This article introduces how to import and publish an Avatar to help you quickly understand the entire Avatar creation process.
Step 1: Create a New URP Project in Unity
- Open the Unity Hub and create a new project.

- On the New Project page, select 2021.3.6f1 for the editor version and 3D(URP) for the template. (Our product is based on URP for better performance.) Then, create a new project, which may take some time.

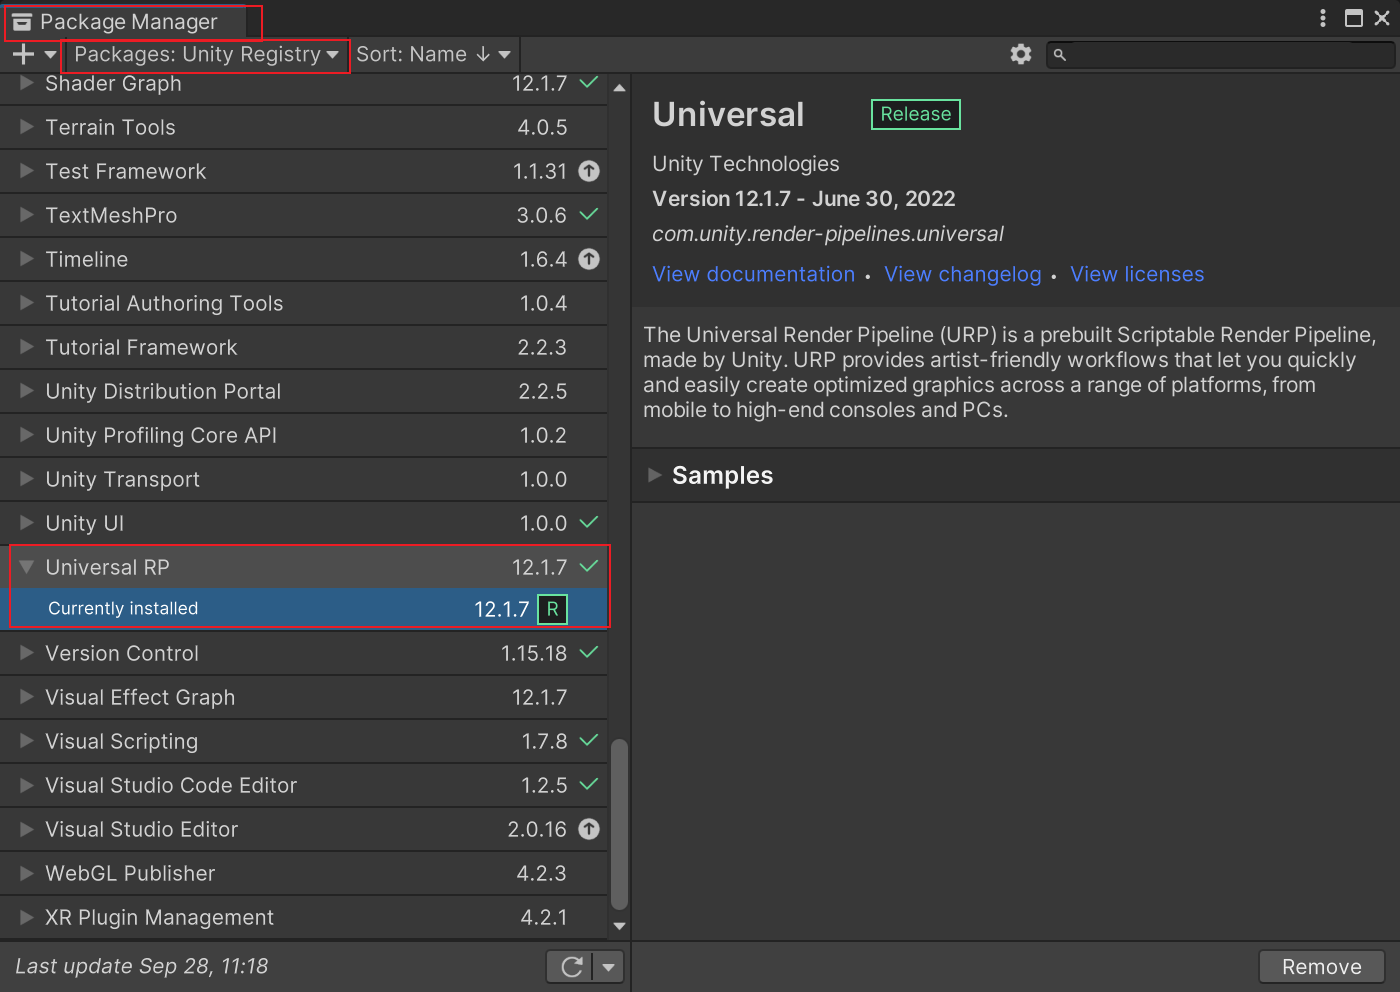
Note: If the project you created is not a URP (Universal Render Pipeline) project, you can download and install Universal RP from the Package Manager to change the property of the project.
Step 2: Import ParaSpace Avatar SDK
- After a new project is created, drag and drop the Unity Package of the ParaSpace Avatar SDK that you have downloaded into the Unity project. Then, click the Import button to complete the import, which may take some time.
Step 3: Create or Get an Avatar
You need a 3D Avatar resource, which is often an FBX file that contains animated bones. You can get such a file in the following 2 ways:
- Create by yourself: A great many tools are available to create an Avatar, for example, Blender, Maya, 3DMax, and Vroid. You can use these tools to create a unique Avatar. However, if you have not created an Avatar before, we recommend you start with "Getting Public Resources". It is time-consuming to learn how to create an Avatar. You can learn how to publish an Avatar before you decide whether to learn modeling.
- Get resources: You can download 3D Avatar resources through many channels, for example, Unity Asset Store and Booth. You can start with the Unity Asset Store, from which any resources you download can be imported to Unity in an easier way. Before you download and use any third-party resources, carefully read the license agreement to check if you are granted the right of use.
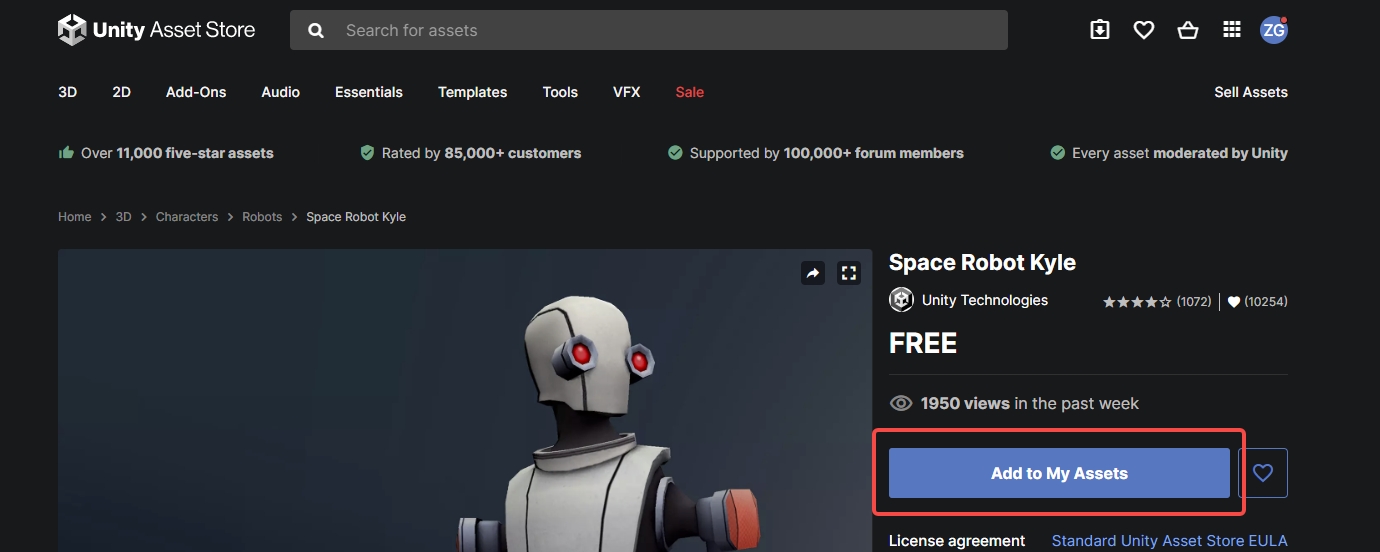
Here, the example is Space Robot Kyle, which is a free Avatar resource in the Unity Asset Store. Click here to download.
Step 4: Download and Import 3D Avatar Resources
- After you complete the steps above, click the URL of Space Robot Kyle that the Unity Asset Store offers.
- Download and import the resource to the project in Unity. After import, you can find the resource in the Assets folder under the project.

Step 5: Replace Shader and Mount Avatar Root
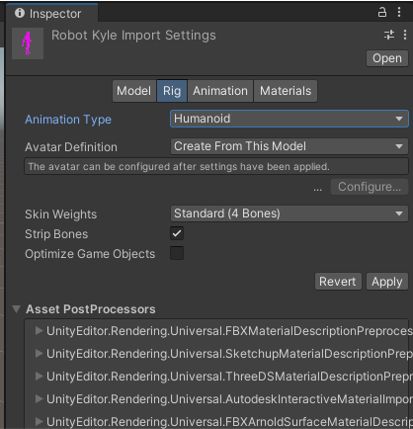
- Find the 3D model Robot Kyle under the folder Assets\Robot Kyle\Model and click it. Then, set the Animation Type to Humanoid on the Inspector panel, and click the Apply button.
Currently, ParaSpace only supports Humanoid models as Avatar models.The reason is that there are many native animation files in the product that are based on the Humanoid skeletal structure. They can only drive Avatar models with a Humanoid skeletal structure, otherwise there will be errors in the animation performance.
If you want to learn in details how to configure an Avatar model with a Humanoid bone structure, you can read this Unity official article. In short, the bone structure of an Avatar model needs to follow certain rules and have 15 necessary bone nodes, and their structural relationships are similar to that of a real human skeleton. For basic knowledge about Humanoid bone structure, you can refer to this Unity official article.
-
After setting up, drag and drop the model to the scene in Unity. The model is shown in purple due to the wrong shader. Since our project is based on URP, only shaders offered by ParaSpace are allowed for use to ensure good performance. Hence, the shader in the model needs to be replaced in most cases. We provide the Shader Configurator tool (renamed to Shader Converter in the new version) to help you replace shaders more easily. After you open Shader Configurator, drag and drop the model to the upper right corner of the panel. Then, set the type to PBR and click Replace. The shader will be replaced automatically. (Note that you can also configure the shader by yourself, and adjust relevant parameters for better effect.)
-
Mount Para Avatar Root, a necessary component for Avatars, to the model. (Your Avatar cannot be uploaded without this component.)
- In Para Avatar Root, set the point of view for your Avatar, which is usually right in front of the Avatar's eyes. If you're interested, read the article on Para Avatar Root. You can skip this configuration and proceed to the next step.

- Drag and drop the Avatar model in the scene to the Project folder, and save it as a prefab file to avoid the loss of the configured model.

Step 6: Publish an Avatar
- Click the "Avatar Publish" button in the upper right corner of the middle of Unity. After the resource check is completed, click the "Upload button" to enter the upload interface.

LoginIf you have never logged in to your account in ParaSpace SDK before, set a password in the Settings of ParaSpace's mobile app first, and then log in using your ParaID.
- On the upload interface, fill in the required information, and then click the "Upload" button to upload the Avatar. Packaging is required before uploading, which may take some time. If your Avatar is uploaded successfully, you will be prompted.
Tips: You can take a picture using the camera in the scene or directly upload an image as the cover image of the Avatar.

- After uploading successfully, your Avatar will be processed and optimized in the cloud for better performance. It may take 5 to 10 minutes. Once completed, you will be able to see the Avatar on the platform.
Congratulations. You have completed your study of this section. Now you can create an Avatar of your own and share it with your friends on the platform.
Updated about 1 year ago