How to Customize UI in a World
To set up complex logic for your World, you may use custom UI.
This section provides instructions on how to add a custom UI panel to a World.
Step 1: Add Canvas and Basic Features
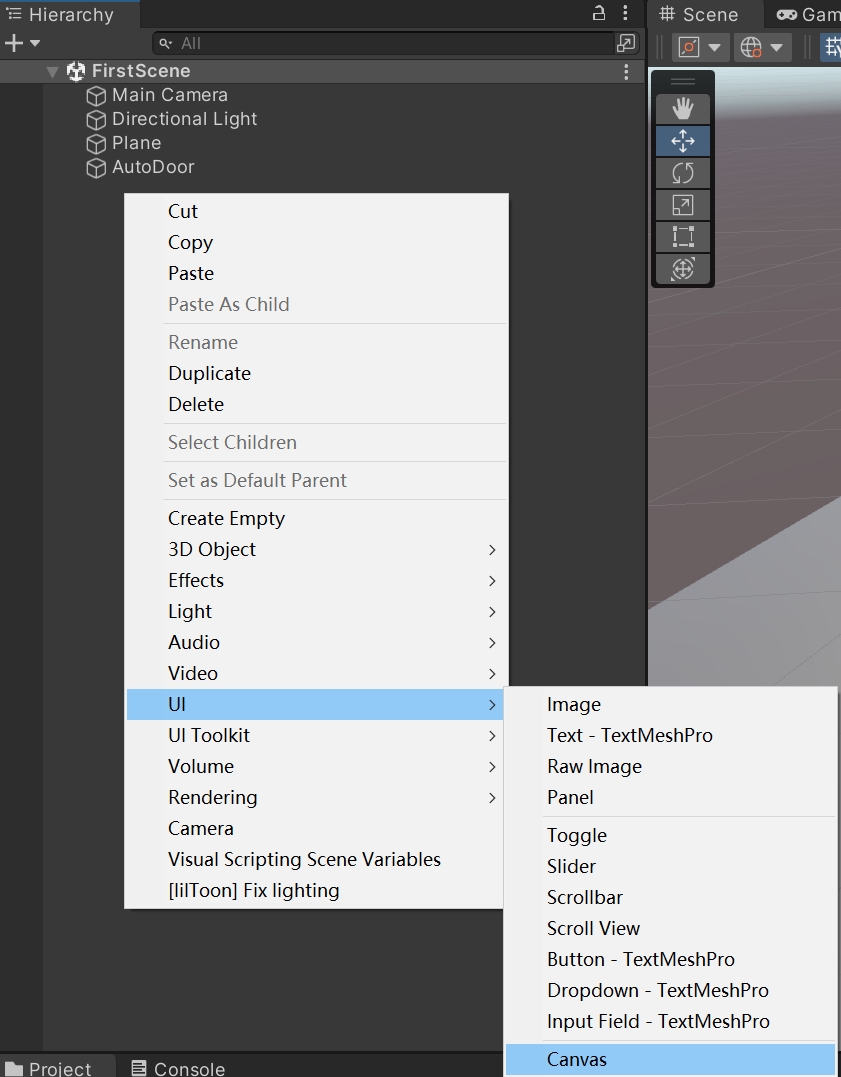
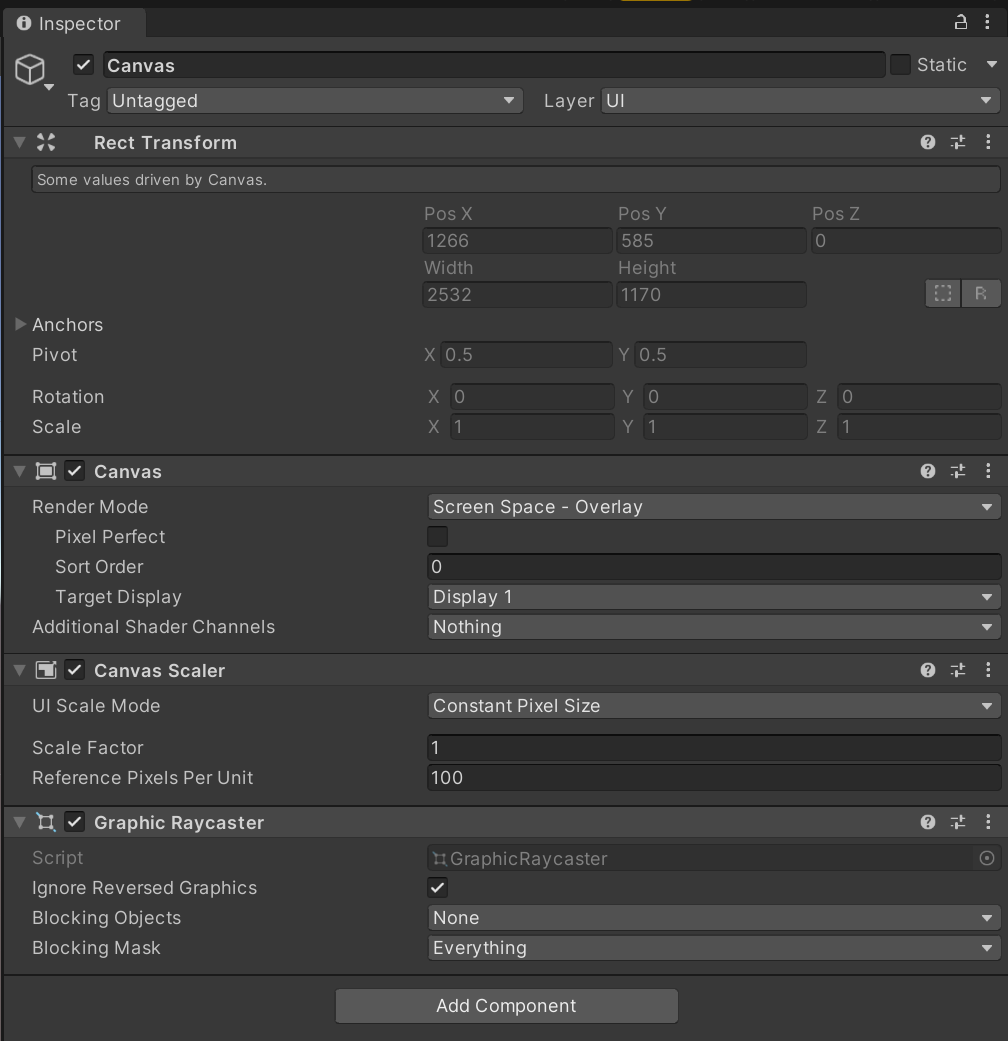
- On the Hierarchy panel, right-click on the blank space and click "UI" > "Canvas". A canvas is then created, where you can preview custom UI in real time.
For details about Canvas, see Canvas.
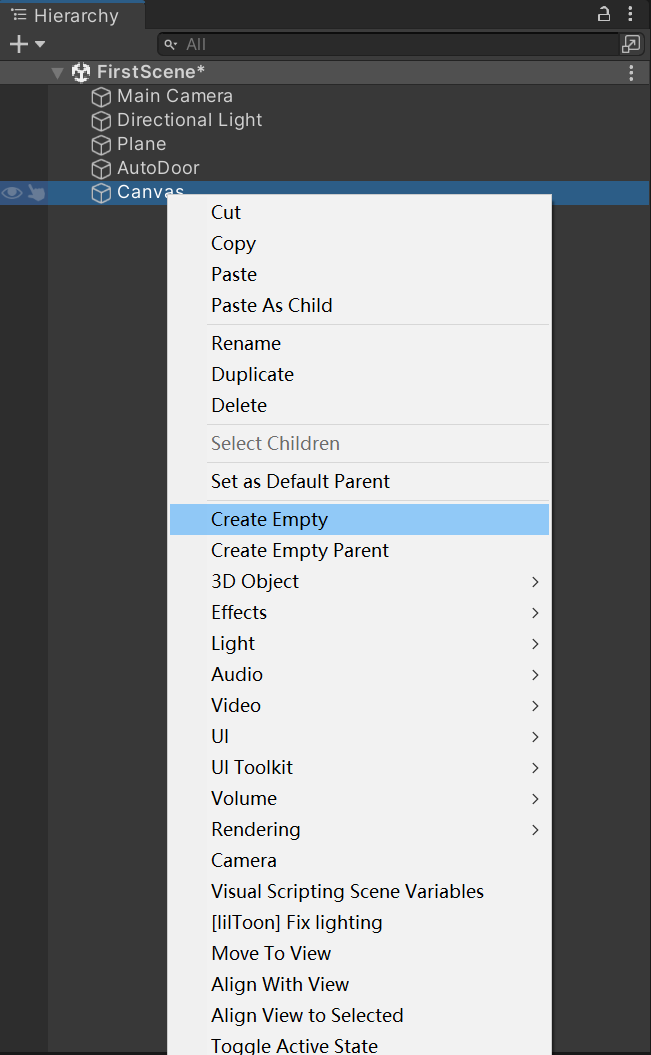
- Right-click "Canvas" > "Create Empty" to create an object named "CustomizeUI".
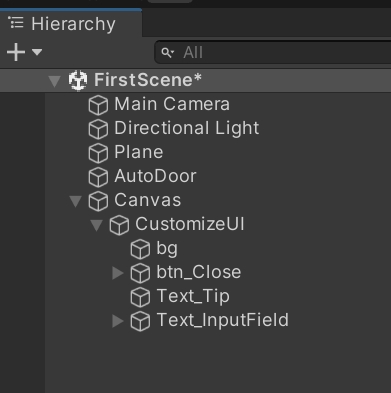
- Right-click "CustomizeUI", click "UI" > "Image" to create an image and name it "bg", click "UI" > "Button - TestMeshPro" to create a button and name it "btn_Close", click "UI" > "Text - TextMeshPro" to create a text component and name it "Text_Tip", and click "UI" > "Input Field - TextMeshPro" to create a text input field and name it "Text_InputField".
A custom UI panel is then created with background, a text input field, and a close button. Various UI types are available in a World and they are different from official UI layers. The following table describes major UI types:
| UI Layer | Sort Order or Range |
|---|---|
| Main UI (including main UI of a camera) | 0 |
| UGC UI | 1 |
| UI in a World | 1~999 |
| Sidebar UI in a camera | 1000 |
| UI displayed in a camera after shooting ends | 1100 |
| Dialog box UI (for example, a dialog box displayed after exiting a camera) | 1200 |
| LoadingUI | 2000 |
| Reconnection UI | 2100 |
| Native UI (including native dialog boxes) | Unlimited |
- As a creator, UGC UI and UI in a World can meet your demands. When creating a UI layer, adjusting its "Sort Order" to the recommended value will bring you best visual experience in the World.
We will explain how to add specific logic to these features below.
For details about the image component, see Image.
For details about the button component, see Button.
For details about the text component, see Text.
For details about the input field component, see Input Field.
Step 2: Write a Custom UI Script
- Create a new script based on what you have learned in the last course and name it "CustomizeUI".
- Open the CustomizeUI script, and define 3 variables: UIPanle, InputField, and CloseButton.

- Write the logic for the panel display method.
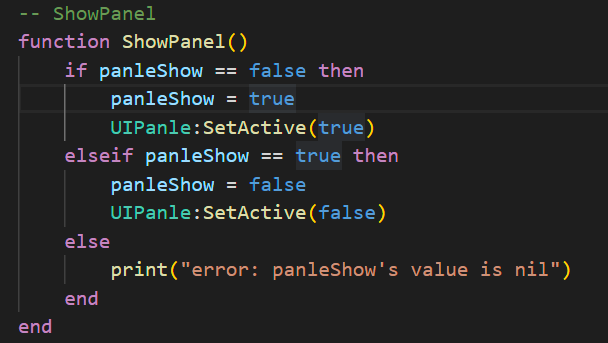
- Write the logic for the panel hiding method.
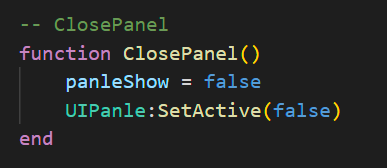
- Configure the default text for the input box.
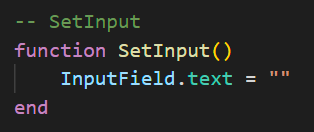
- Click the CustomizeUI object to add Para Script and mount the CustomizeUI script.
- Drag CustomizeUI, Text_InputField, and btn_Close components to the corresponding fields.
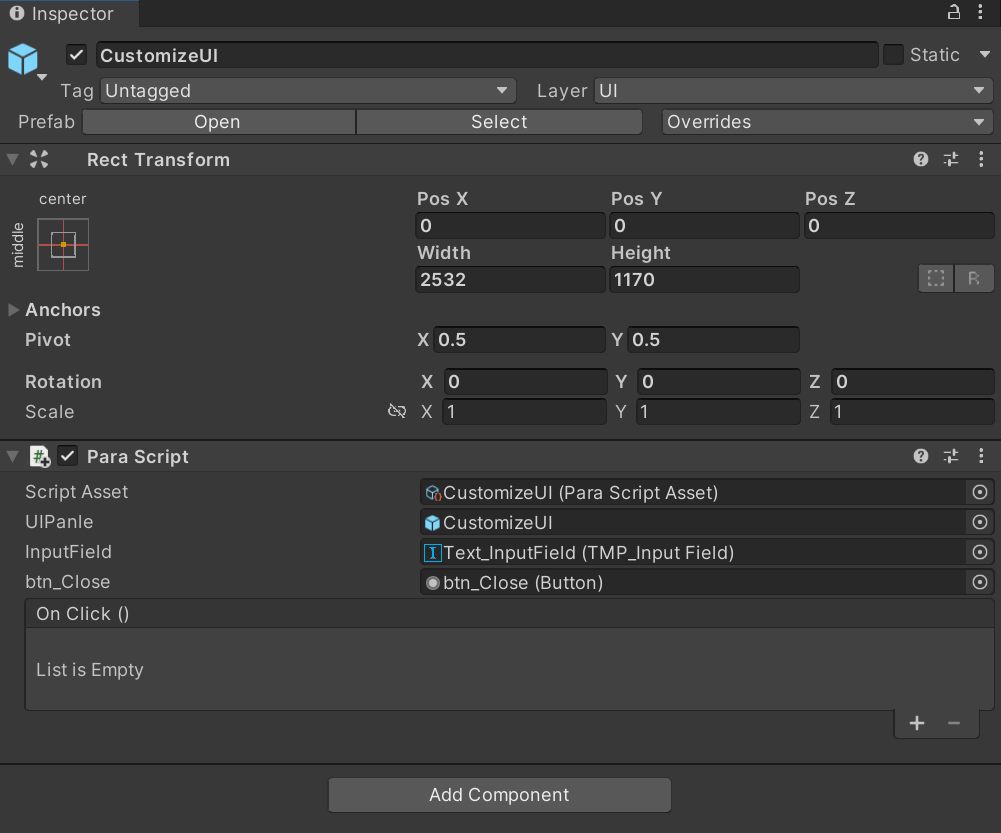
- Add an onclick method by dragging in CustomizeUI and click "NoFunction" > "ParaScript" > "CallMethod(string)".
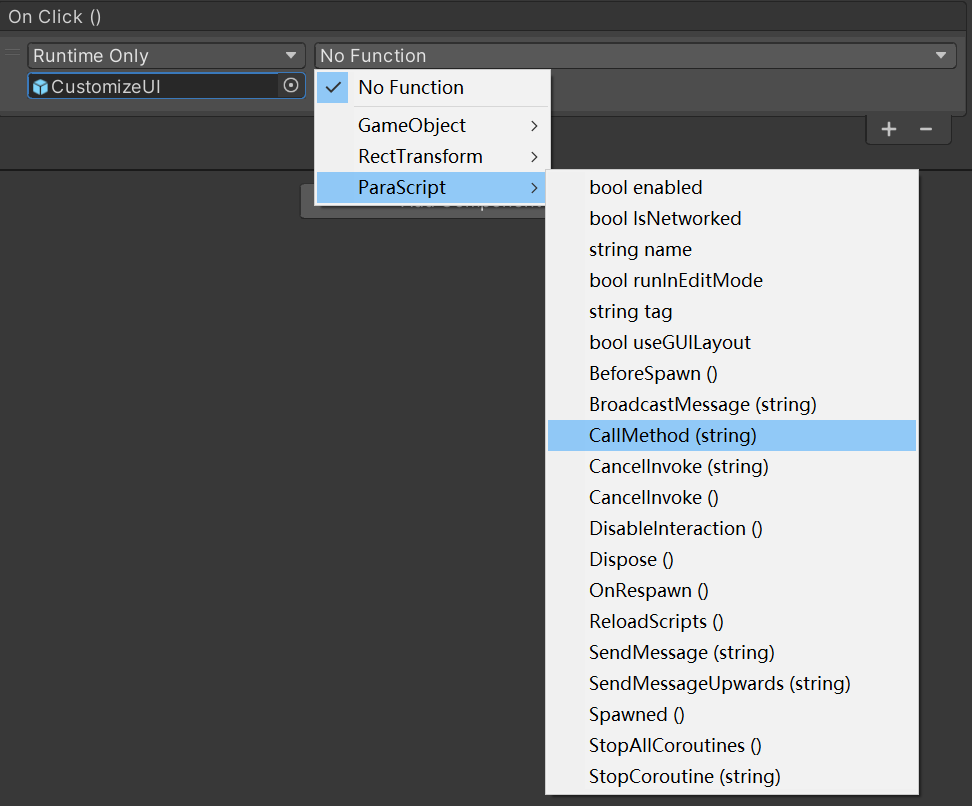
- Enter ClosePanel in the method input box. This means that the UI panel will be hidden once you click the close button.
- Drag CustomizeUI to the FirstWorld folder.
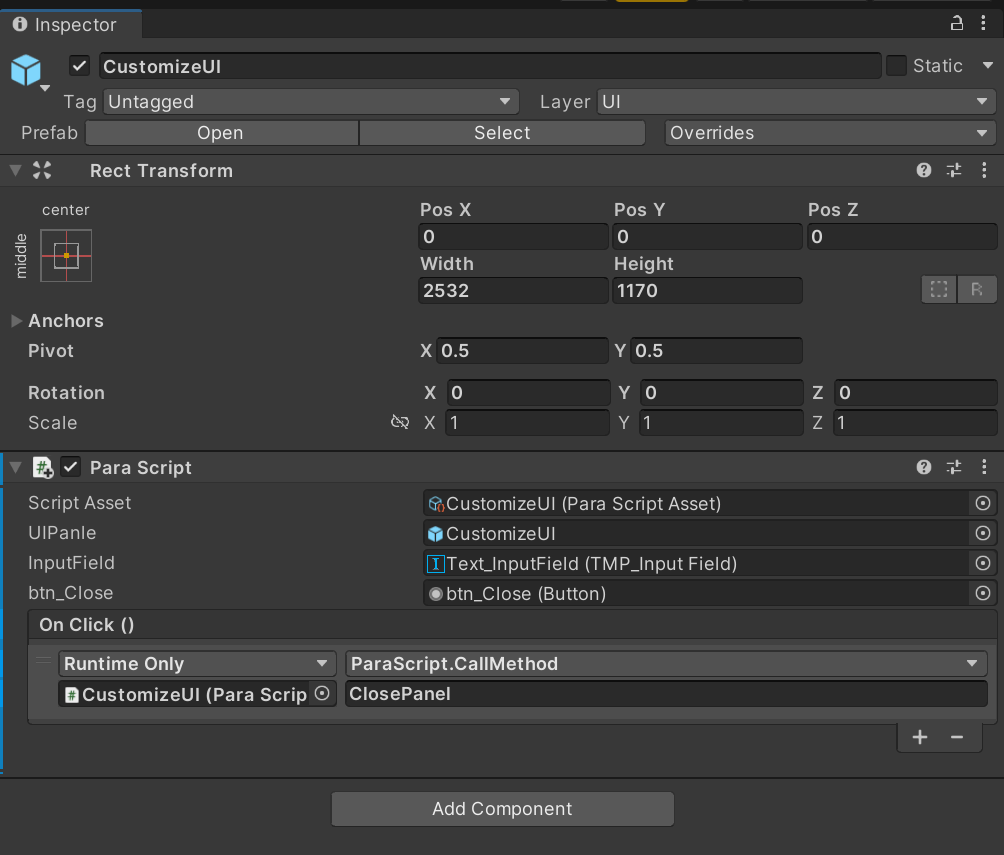
Finally, a basic custom UI panel is implemented.
Updated 9 months ago