
Create Your First World
This article introduces how to import and publish a World to help you quickly understand the entire World creation process.
Step 1: Create a New URP Project in Unity
- Open the Unity Hub and create a new project.

- On the New Project page, select 2021.3.6f1 for the editor version and 3D(URP) for the template. (Our product is based on URP for better performance.) Then, create a new project, which may take some time.

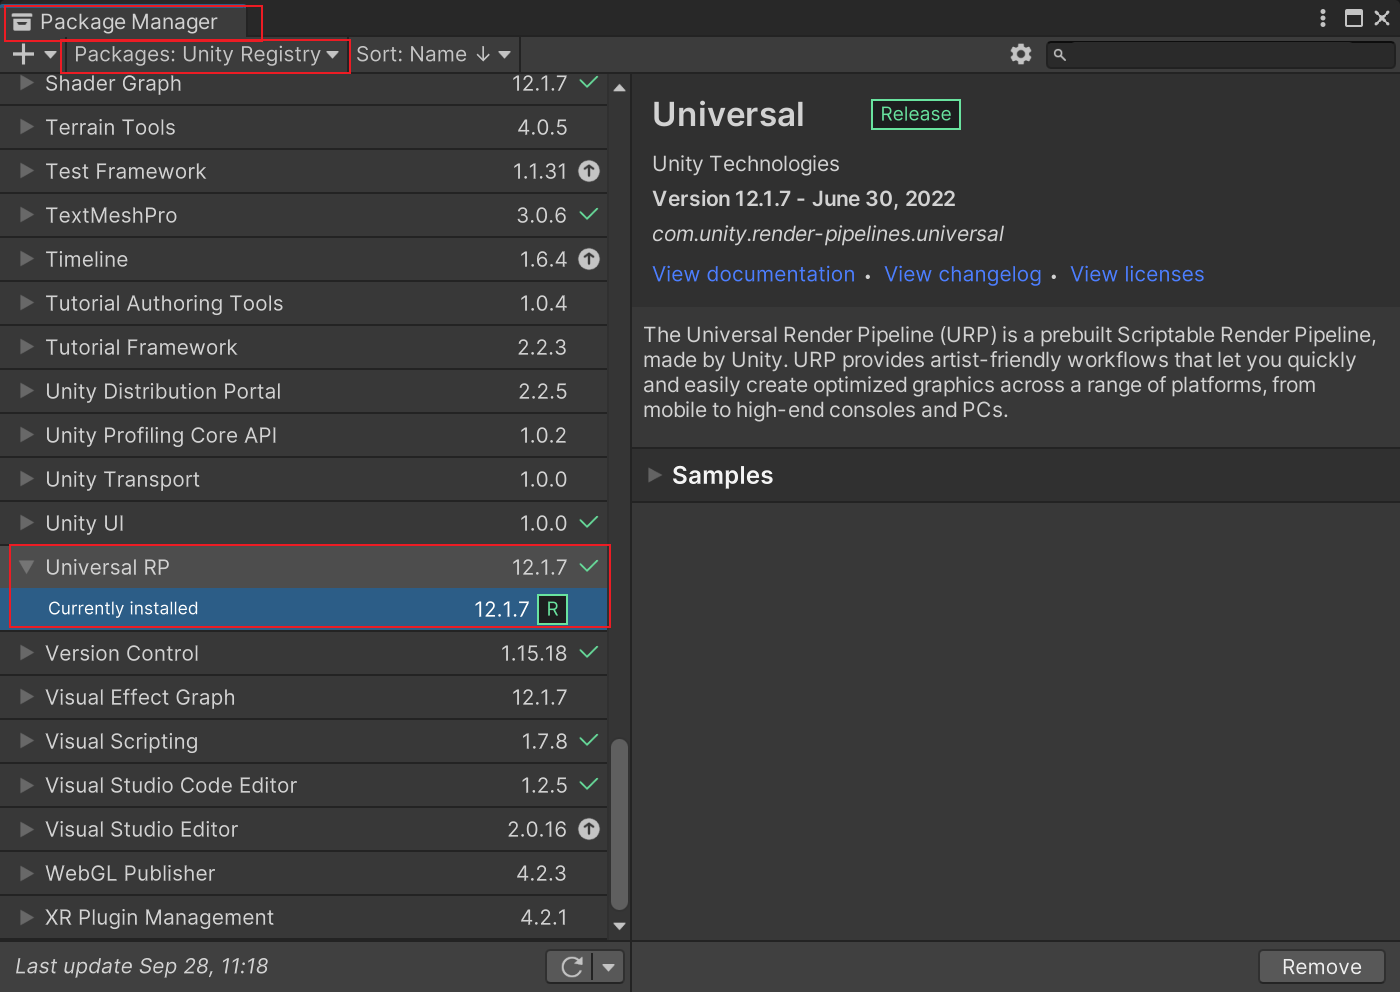
Note: If the project you created is not a URP (Universal Render Pipeline) project, you can download and install Universal RP from the Package Manager to change the property of the project.
Step 2: Import ParaSpace World SDK
- After a new project is created, drag and drop the Unity Package of the ParaSpace World SDK that you have downloaded into the Unity project. Then, click the "Import" button to complete the import, which may take some time.
Step 3: Create a New Scene
- Create a folder in Unity, and then name it "FirstWorld".
- Right-click on the blank space of the folder, and then click "Create" > "Scene". An empty scene is created.
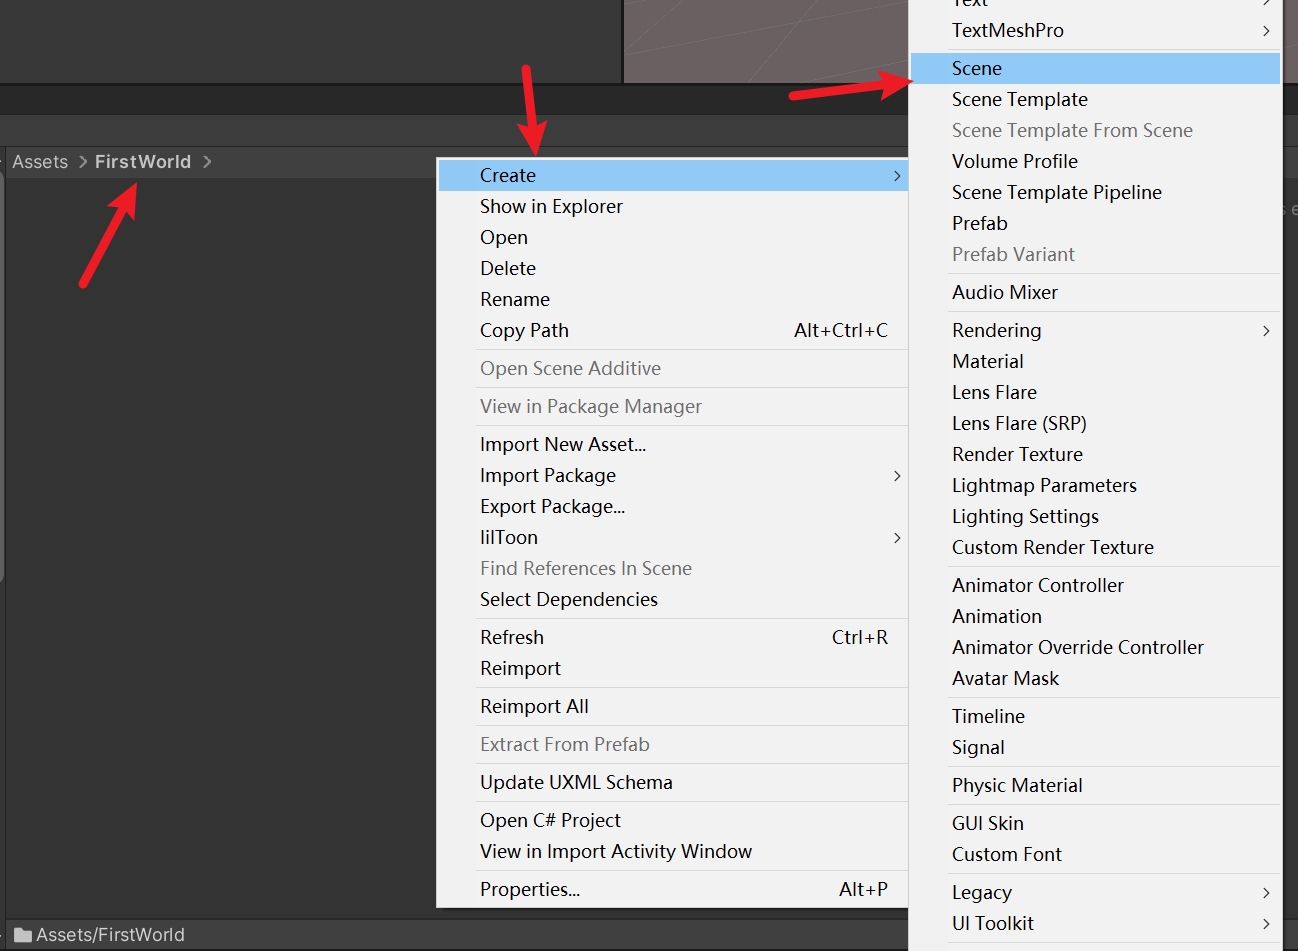

created scene file
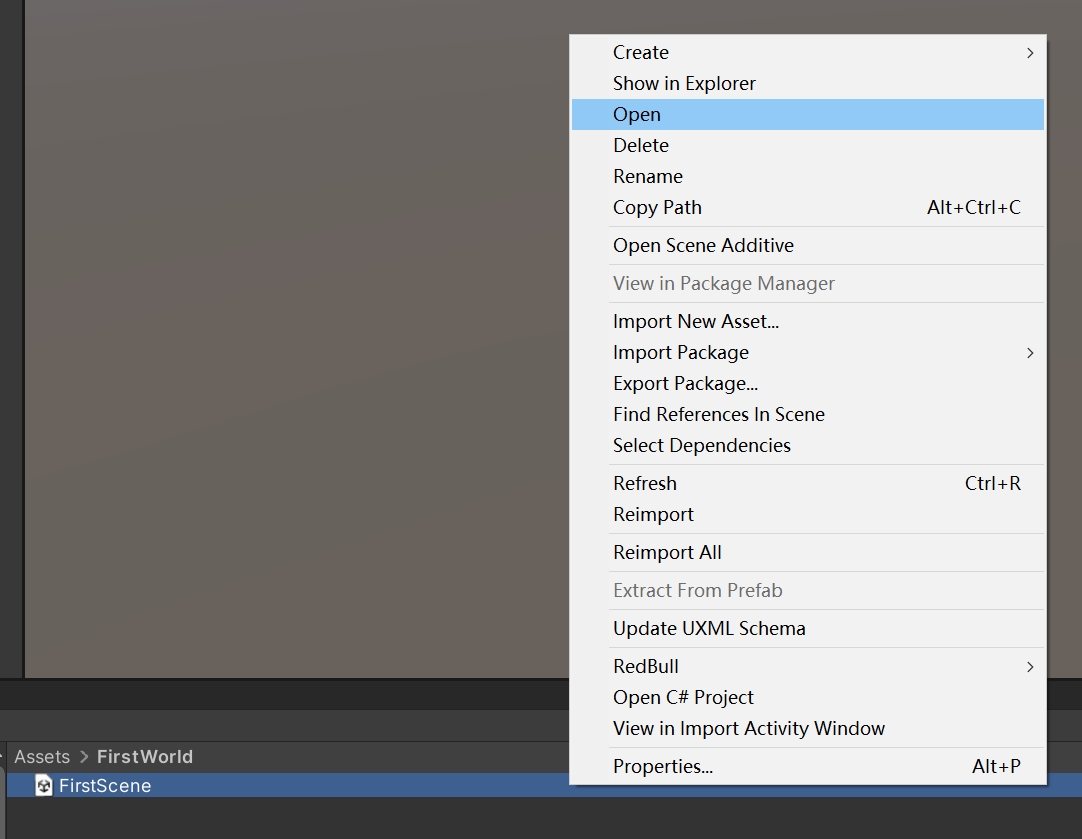
- Name the newly created scene "FirstScene". To open the scene, you can right-click it and then click "Open", or double-click it.
Step 4: Create a World with the Empty Scene
- On the Hierarchy panel, right-click on the blank space and click "3D Object" > "Plane". A patch of ground is created for your World.
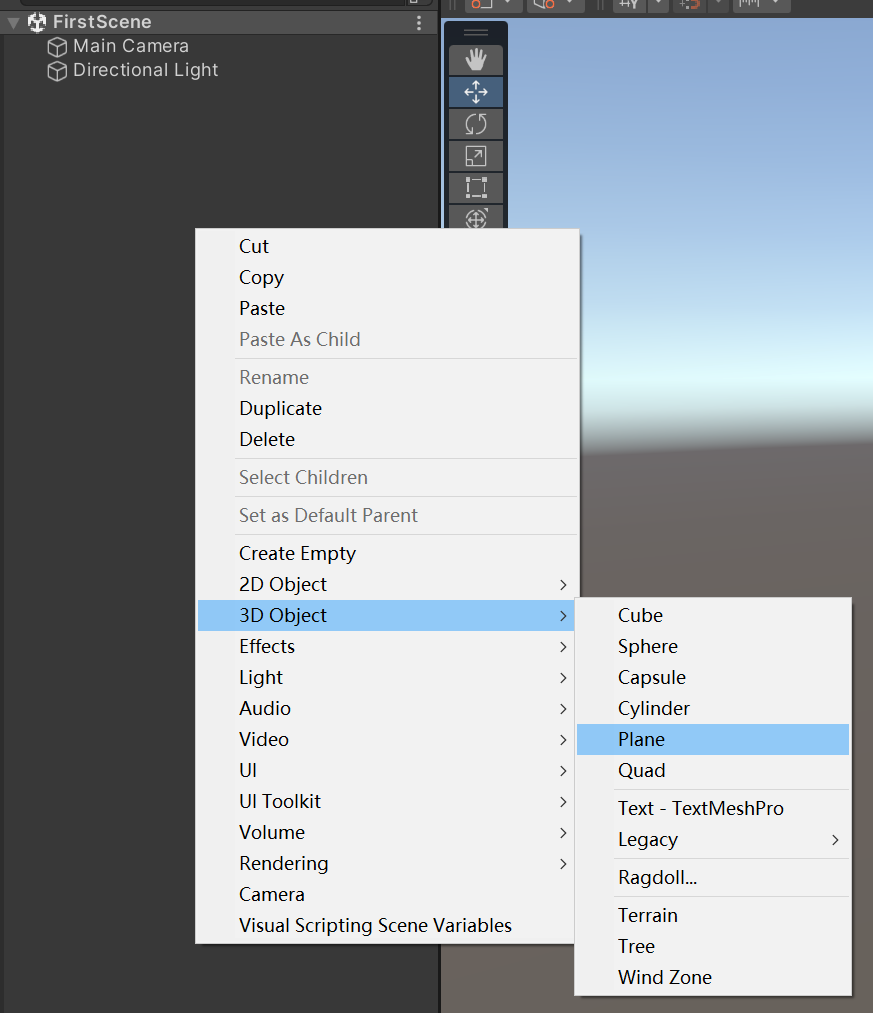

created ground
- Right-click again on the empty space of the Hierarchy panel and click "Create Empty" to create an empty object, and name it "WorldBorn".
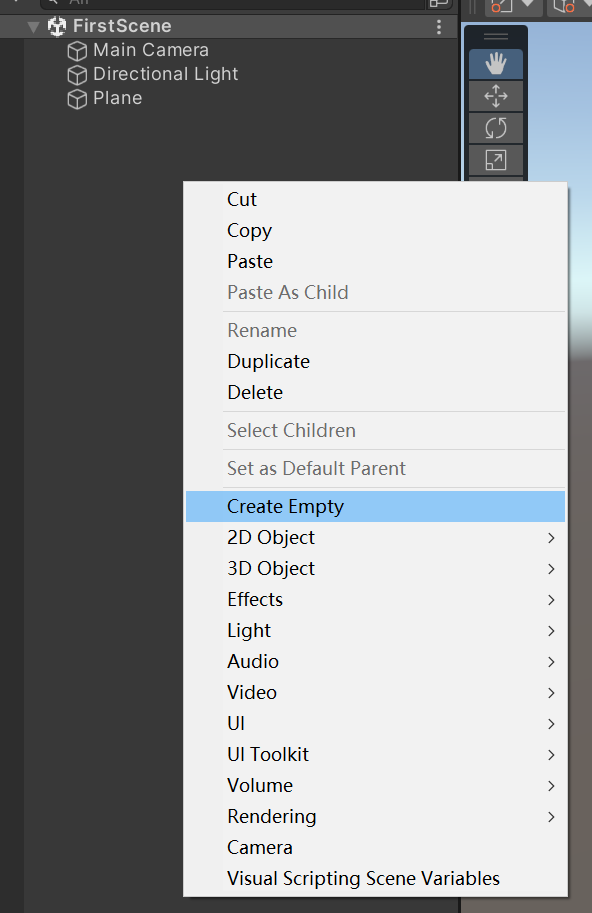
empty object shown in the scene
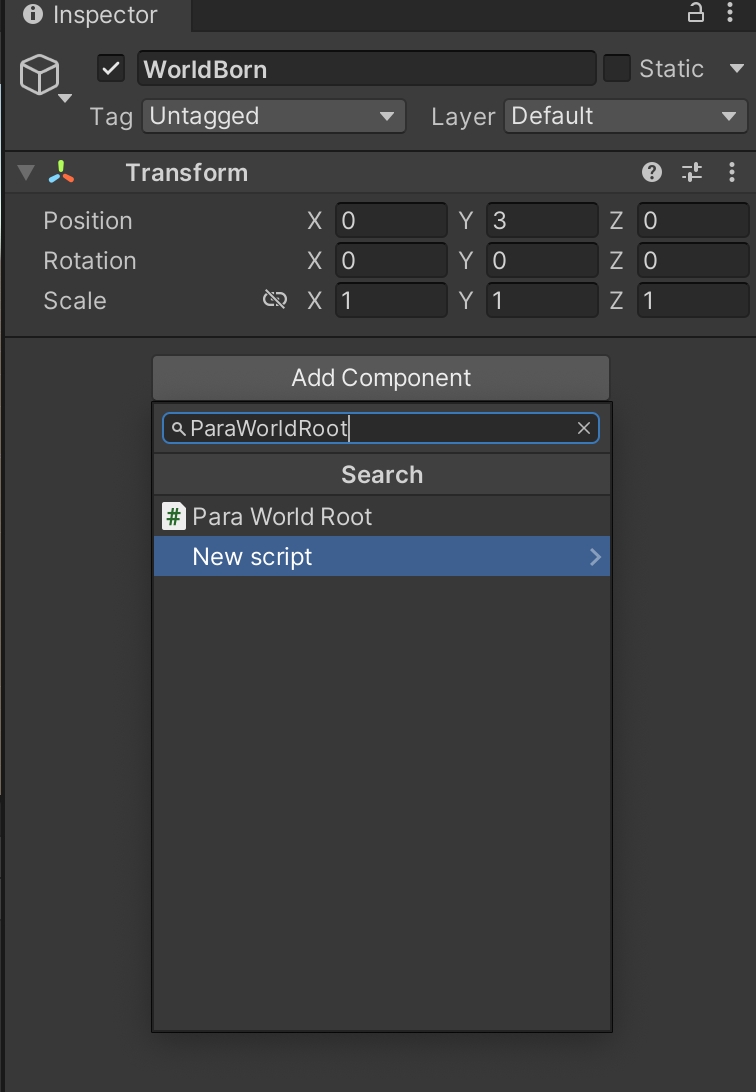
- Select the object "WorldBorn" that you just created. Then, click "Add Component", and enter "ParaWorldRoot" on the Inspector panel. Find and click the "ParaWorldRoot component" in the search results. After that, a Spawn Point is set. If you want to learn about other properties of ParaWorldRoot, read the article on Para World Root.
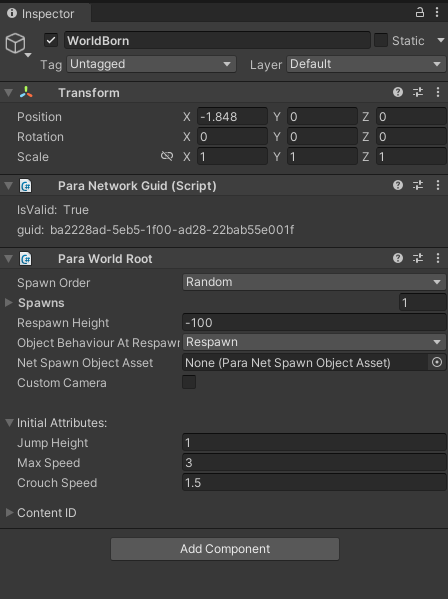
- You have created a basic World. It has a patch of ground for standing, and a Spawn Point where players spawn.
Step 5: Enrich Your World
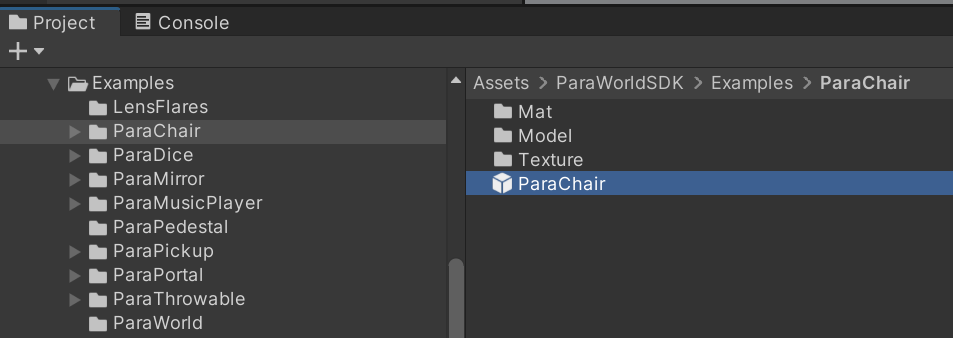
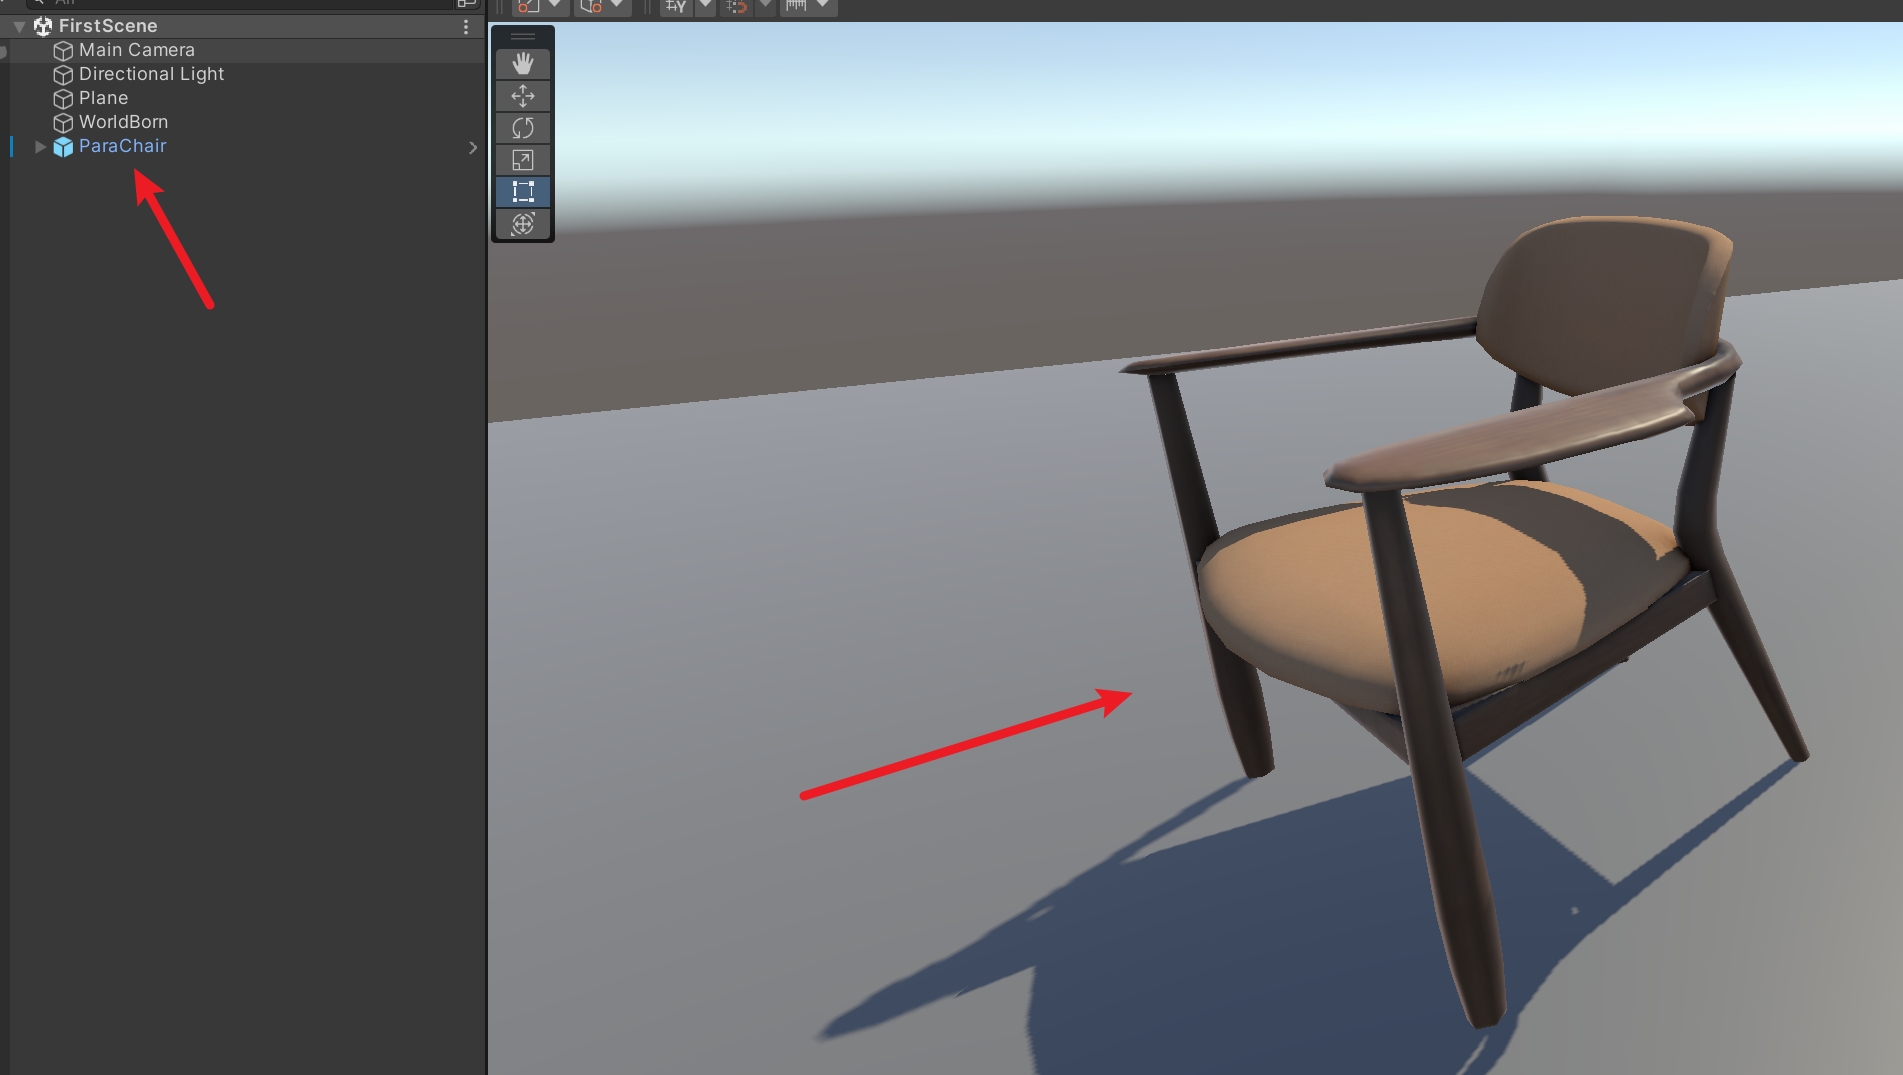
- On the Project panel, click "ParaWorldSDK" > "Examples" > "ParaChair" to find the ParaChair prefab file, and then drag and drop it to your scene. A chair is created for your World.
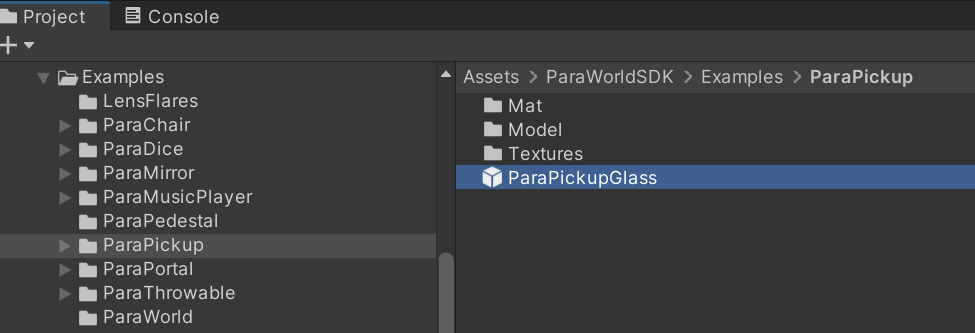
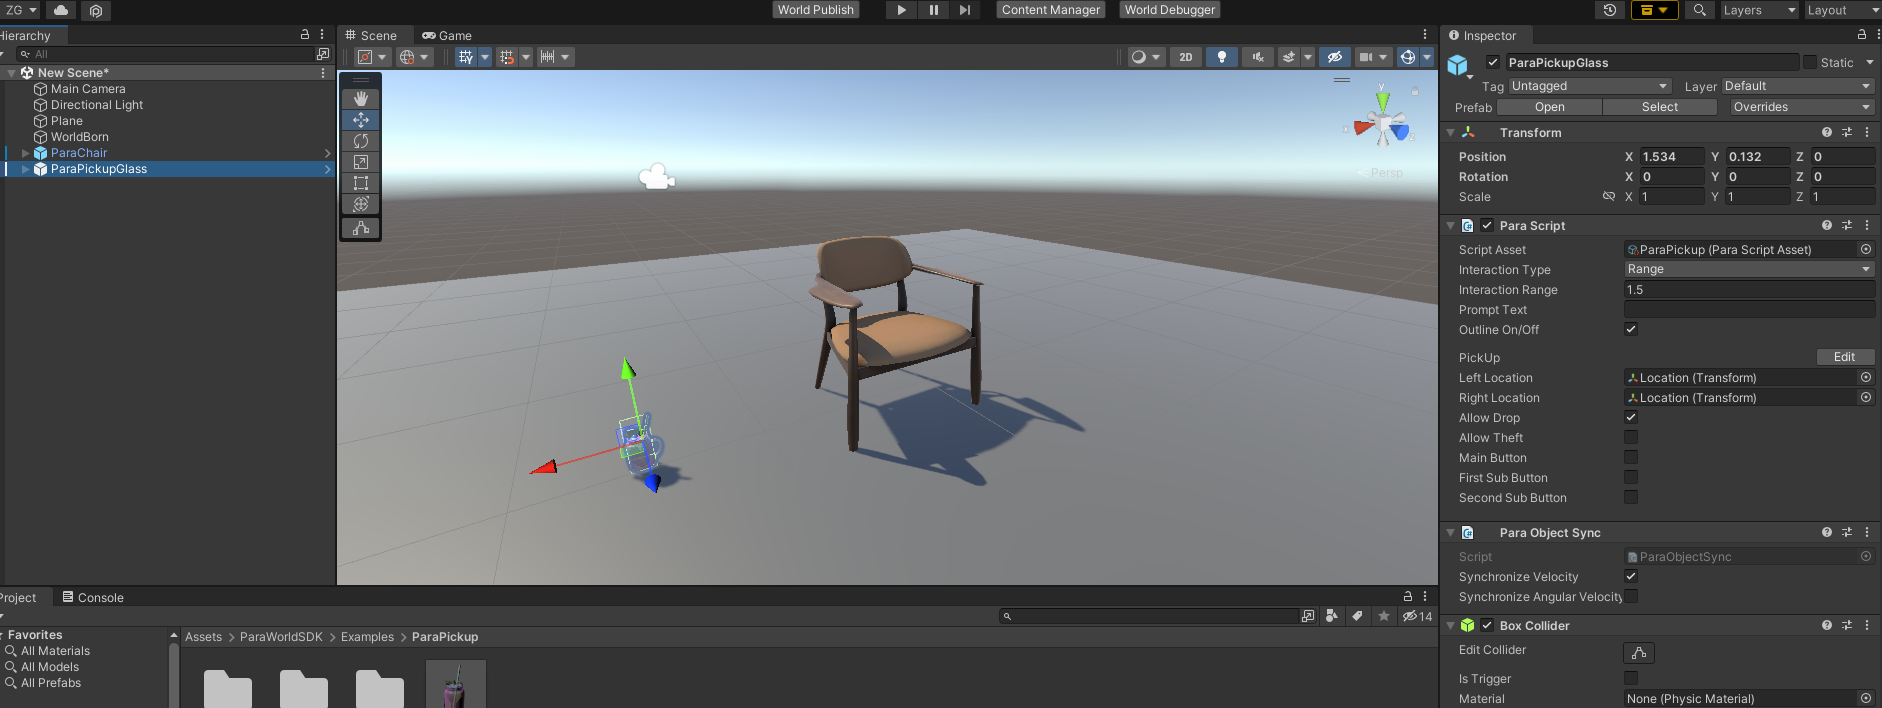
- On the Project panel, click "ParaWorldSDK" > "Examples" > "ParaPickup" to find the ParaPickupGlass file, and then put it in your scene. A glass that can be picked up is created for your World.
- Of course, you can also select other templates in the SDK or import whatever resources you want.
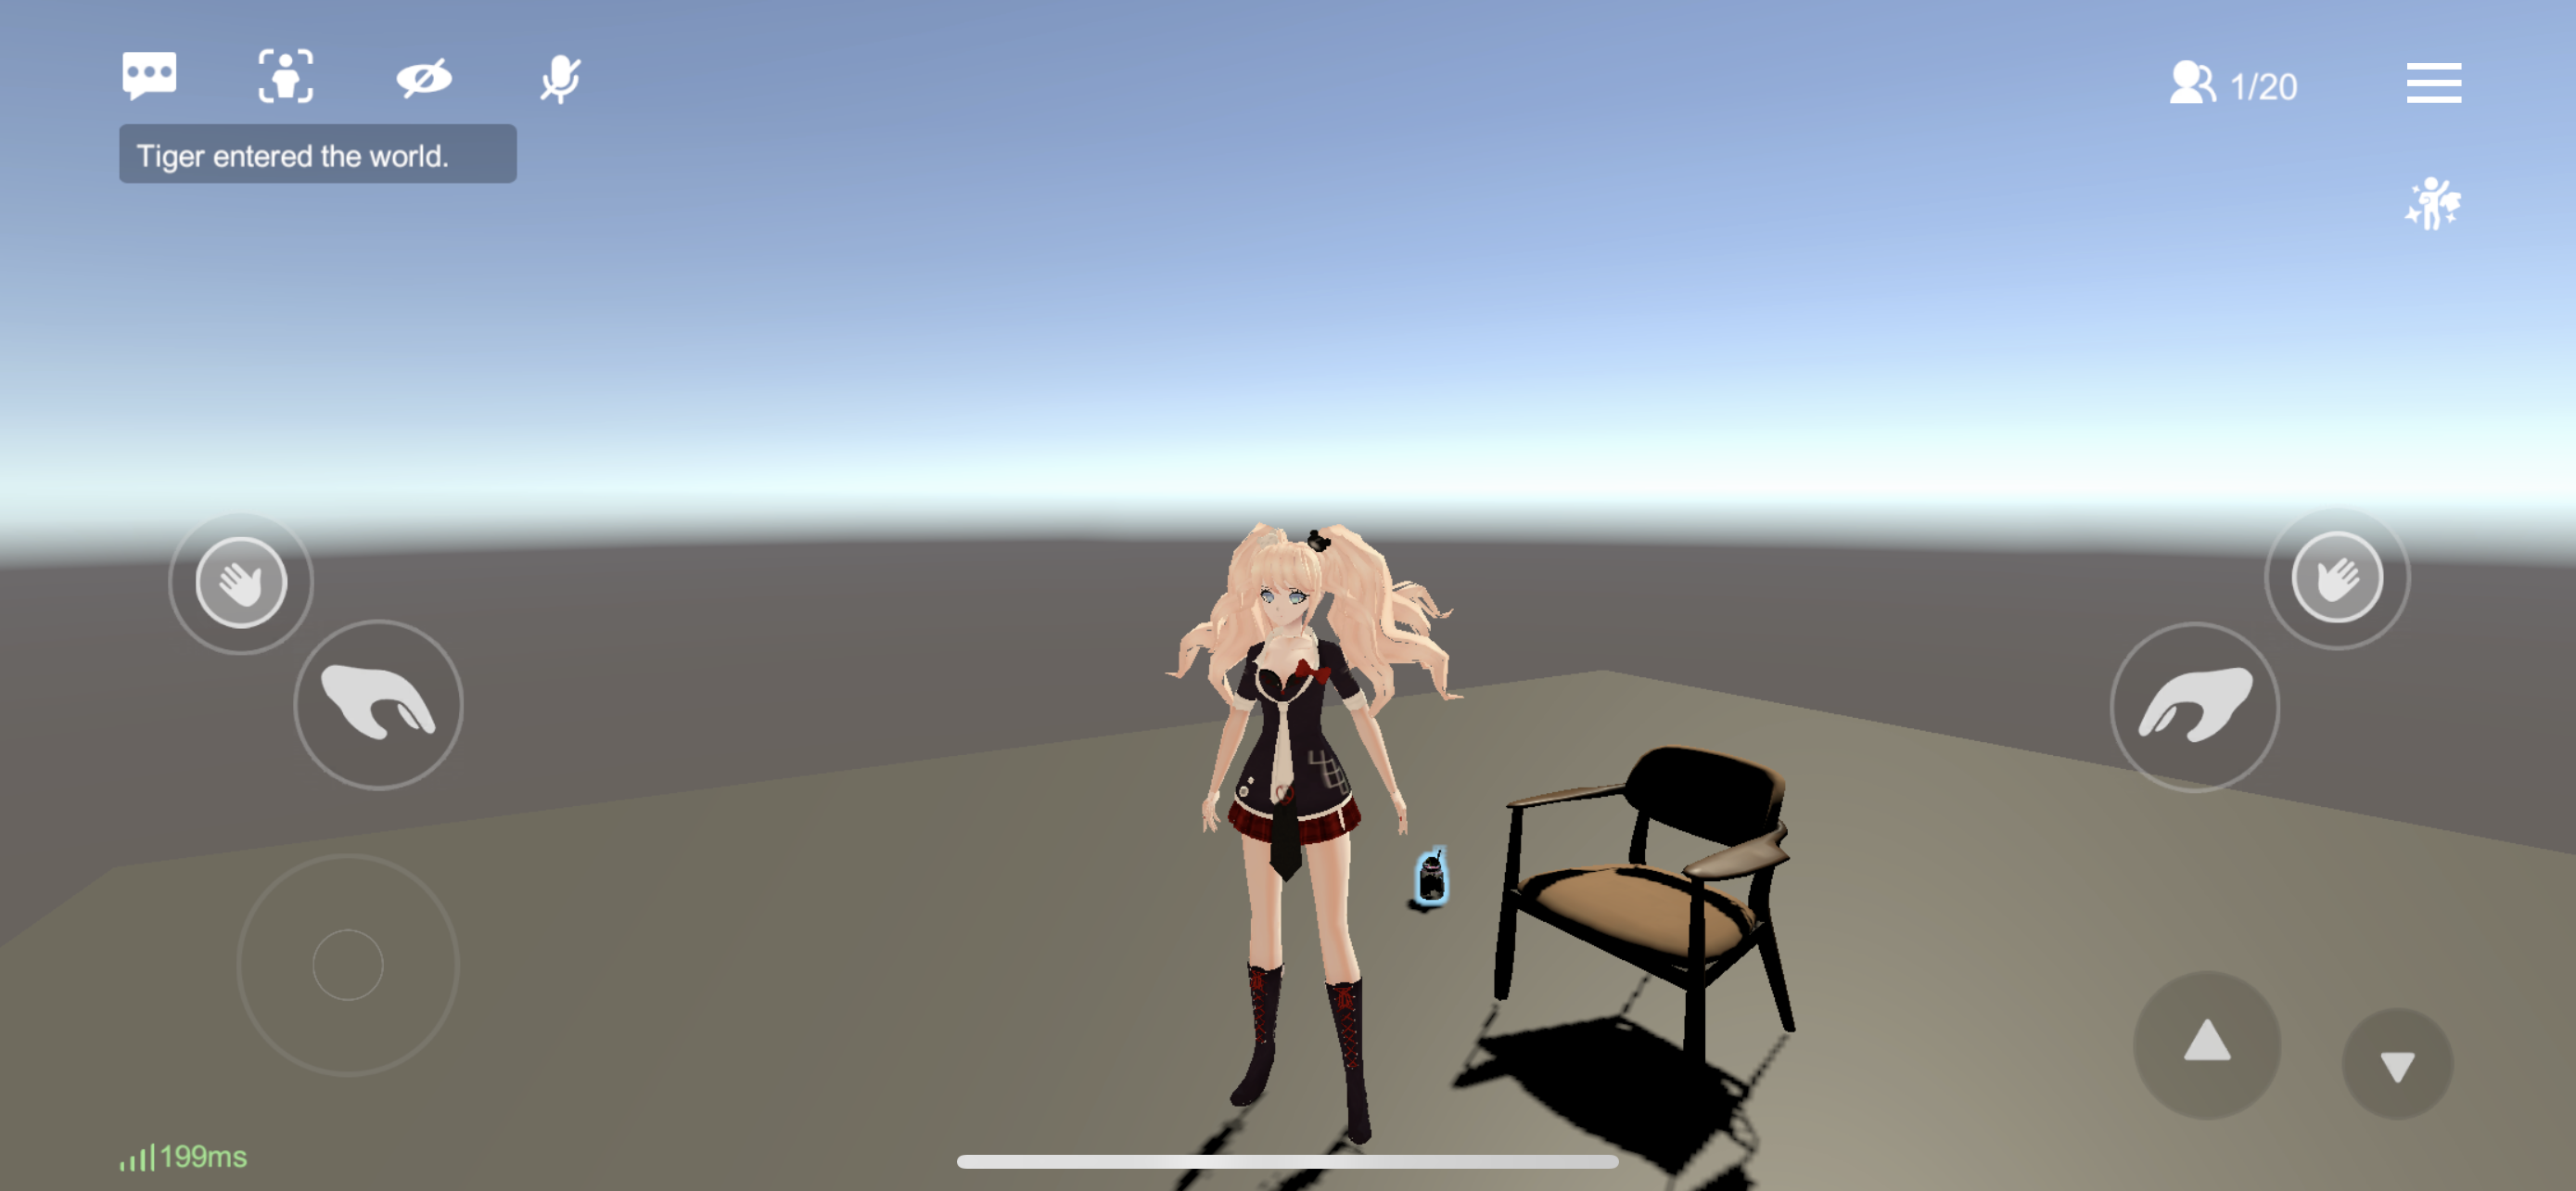
You have created your first World. It has a Spawn Point, a patch of ground, a chair that can be sat on, and a glass that can be picked up.
Step 6: Upload Your World
- After creation, publish your World on the platform so that you can share it with your friends.
- On the top of the Unity interface, click "World Publish" for an upload.

LoginIf you have never logged in to your account in ParaSpace SDK before, set a password in the Settings of ParaSpace's mobile app first, and then log in using your ParaID.
- After the resource check is completed, click the Upload button to enter the upload interface. On the Para World Upload interface, you can set the name, description, tags, and maximum number of players for your World. Besides, you can specify whether the World is public or private.
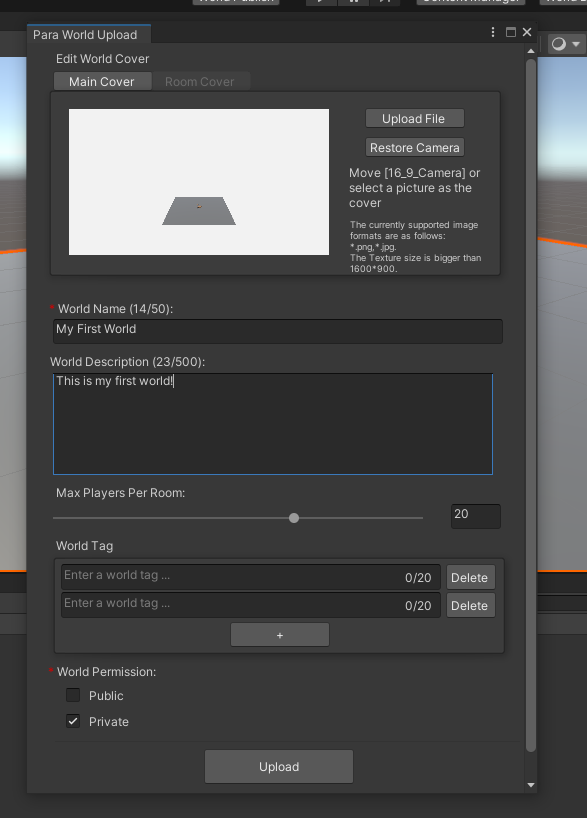
- After setting up, click "Upload" to upload the World. Once "Upload" is clicked, packaging begins, which may take some time. When packaging is completed, Unity will display a prompt indicating successful upload. After the World is uploaded into the cloud, it will take 5 to 10 minutes to complete cloud processing before you can view the World in the ParaSpace app.
- Find the World that you just uploaded in the app and enjoy it.
Congratulations. You have completed your study of this section. Now you can create a World of your own and share it with your friends on the platform.
Updated about 1 year ago